Chapter 5 - Configuring OPNsense and Setting Up VLANs
Configuring OPNsense and setting up VLANs to segment traffic.

Introduction
After successfully accessing the OPNsense web interface from the Debian internal admin VM in Chapter 4, we now move on to completing OPNsense’s initial configuration and creating VLANs to segment traffic for security tools and internal services.
Initial OPNsense Configuration
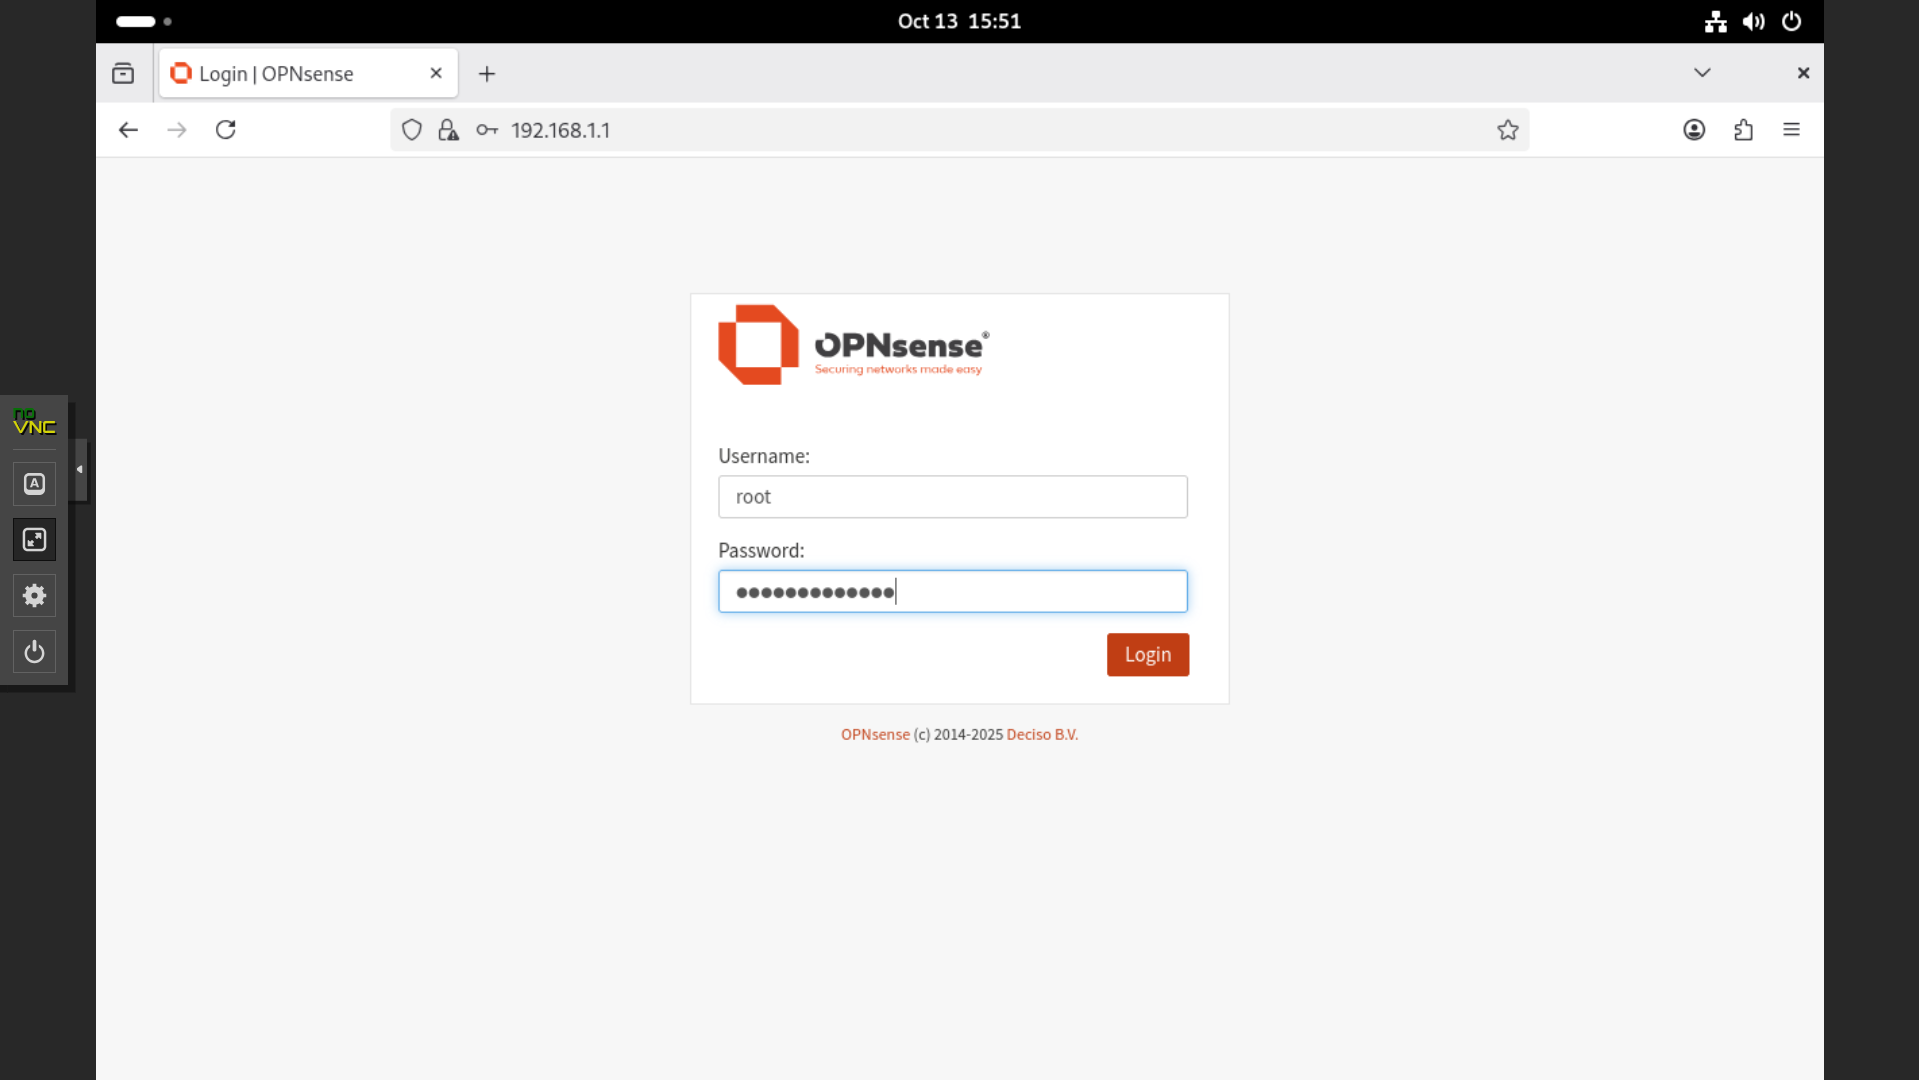
- Log in to the OPNsense web UI from the Debian internal admin VM.
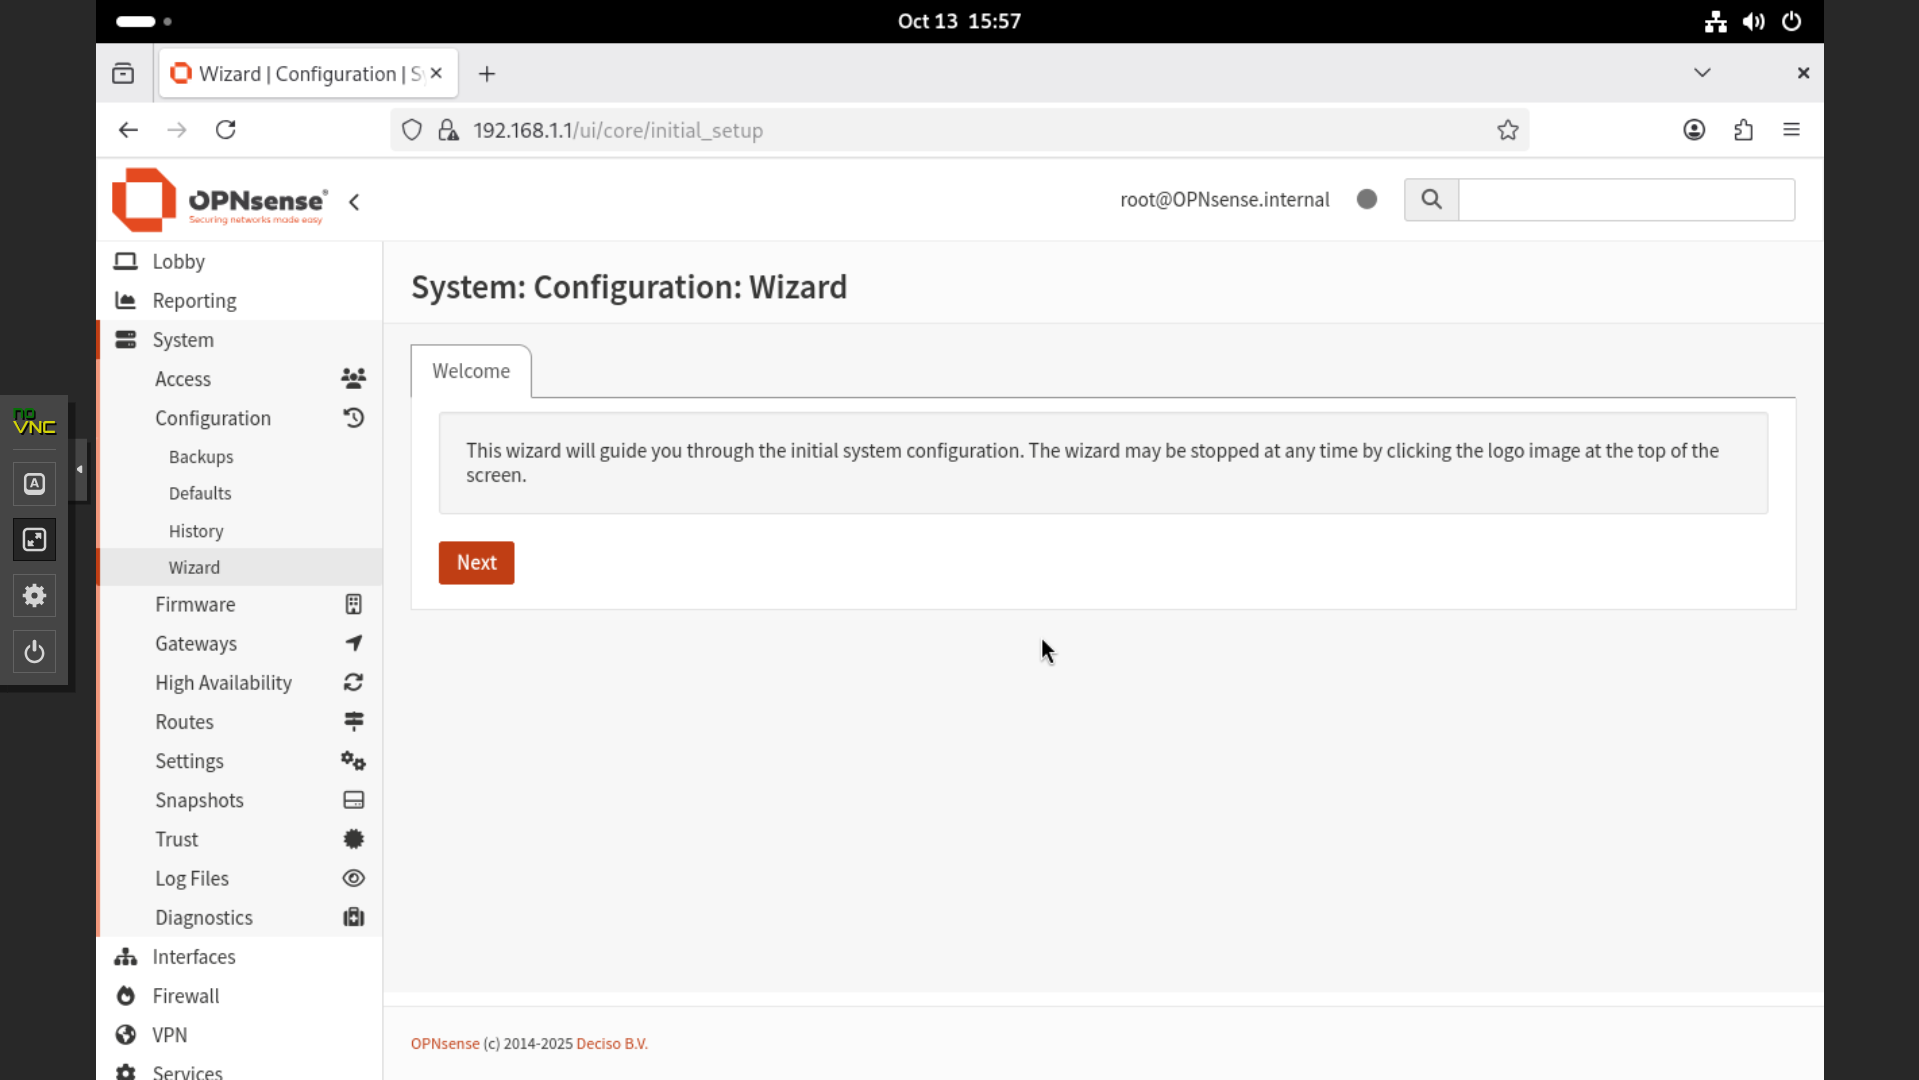
- Go through the setup wizard under System → Configuration → Wizard and click “Next.”
- Under General Information, set the hostname as
opnsense, and configure the DNS servers as1.1.1.1and9.9.9.9. These are public DNS servers provided by Cloudflare and Quad9, known for their speed, reliability, and enhanced privacy protection. Enable DNSSEC support and harden DNSSEC data. Keep the default settings for the remaining fields.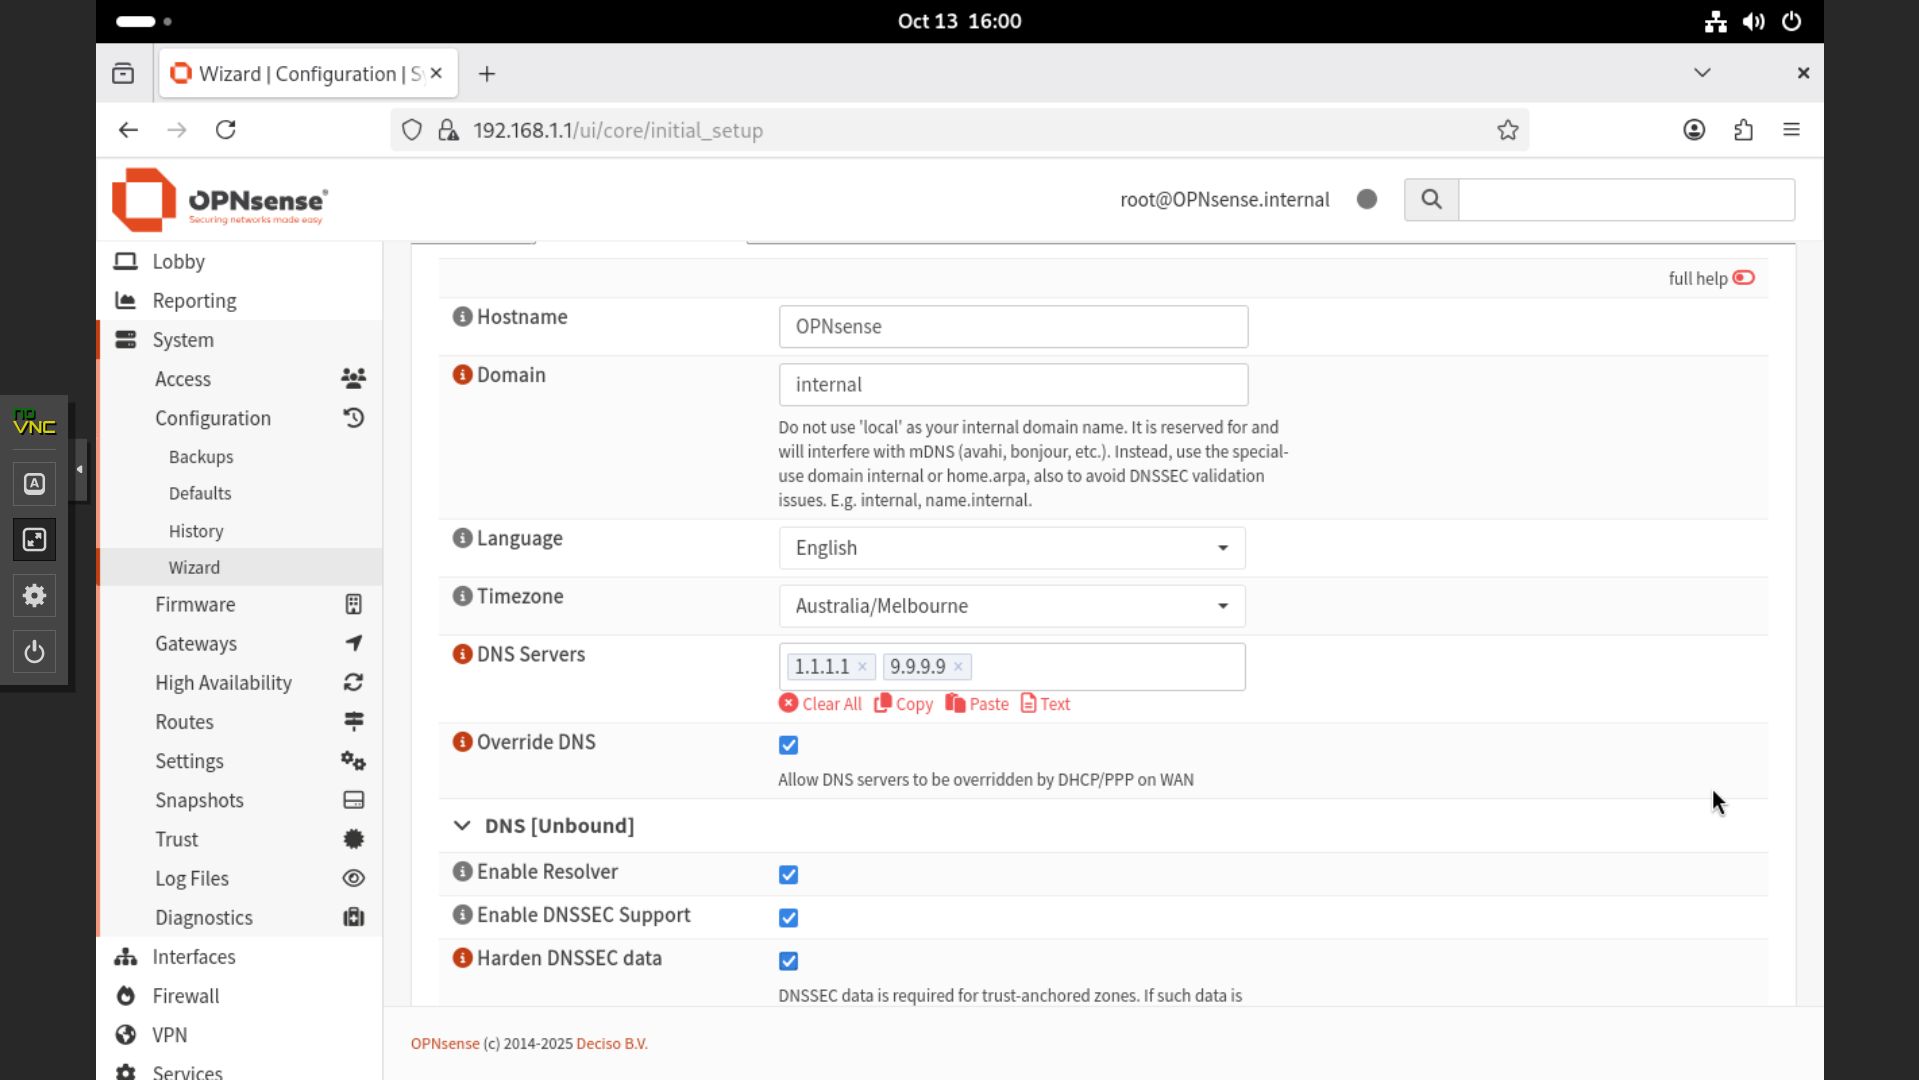
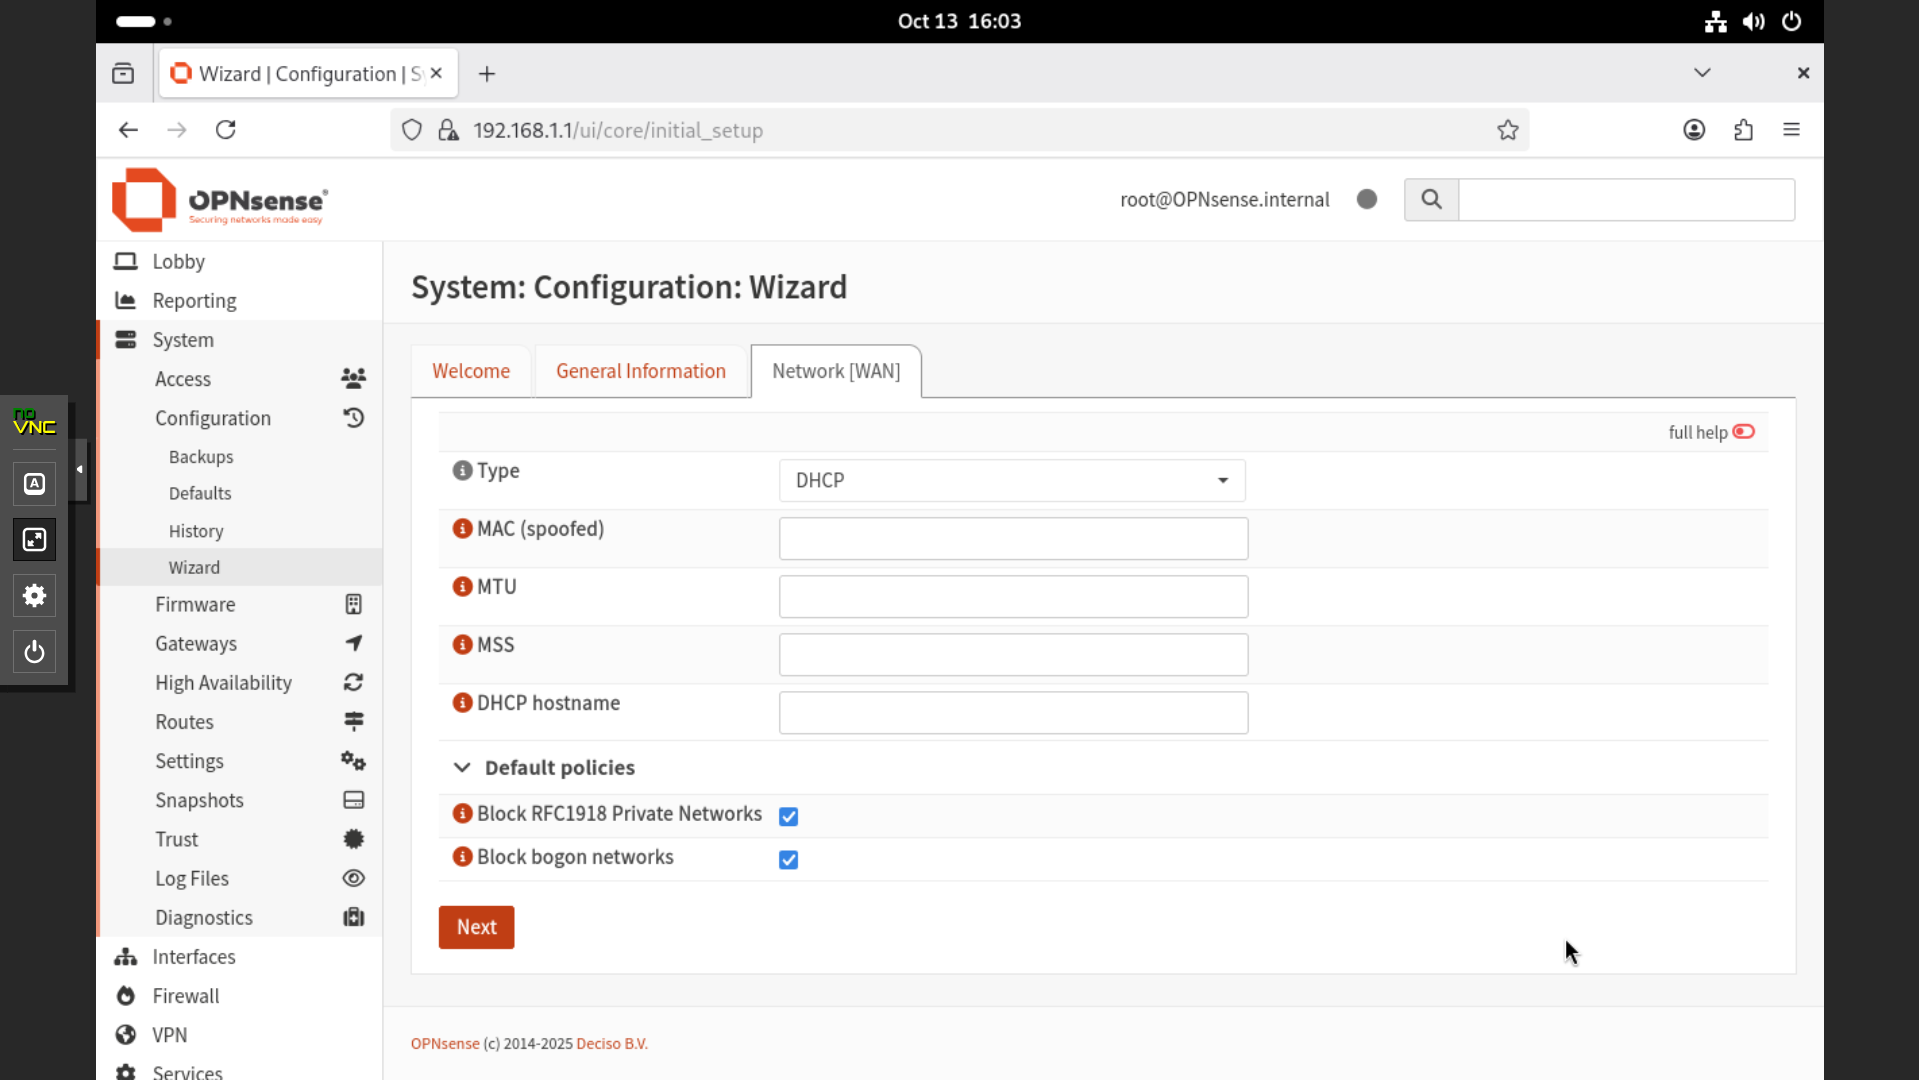
- Under Network – WAN, keep the default settings.
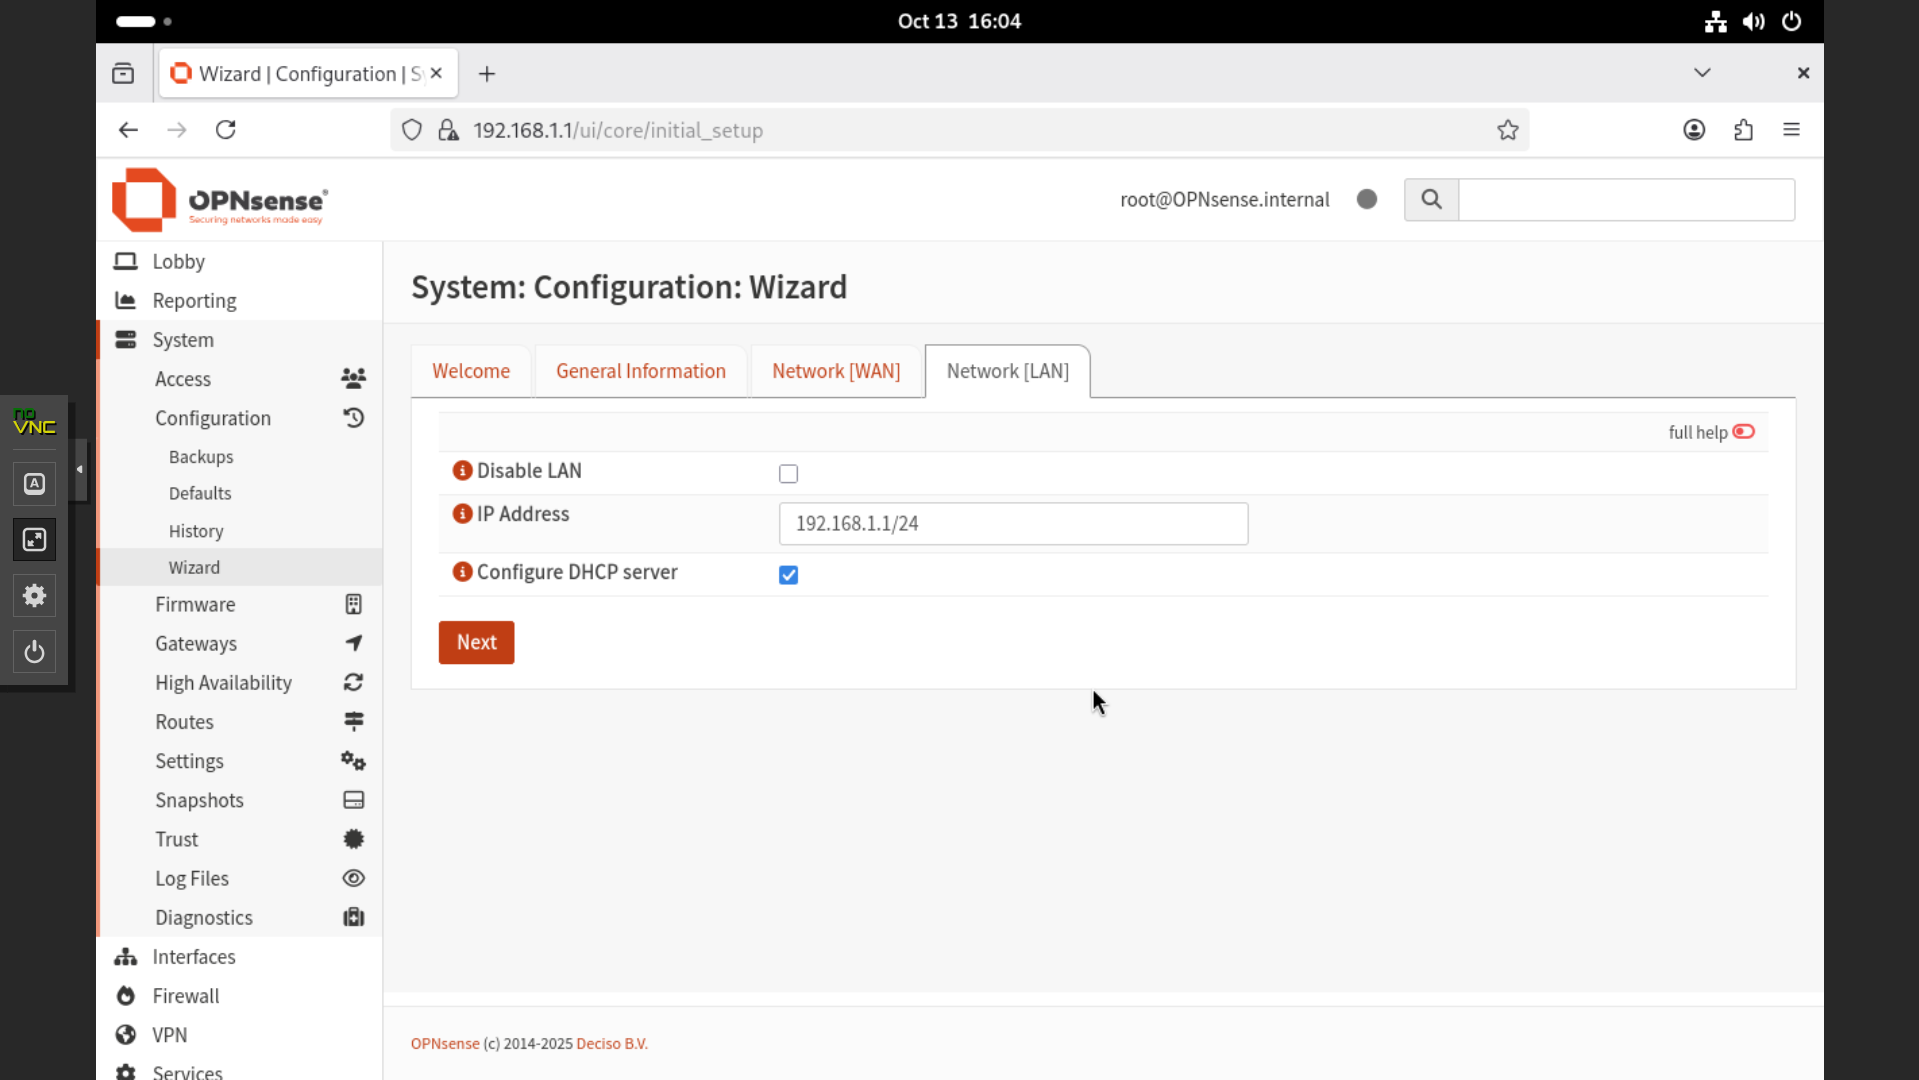
- Under Network – LAN, verify the OPNsense IP address and keep the default settings.
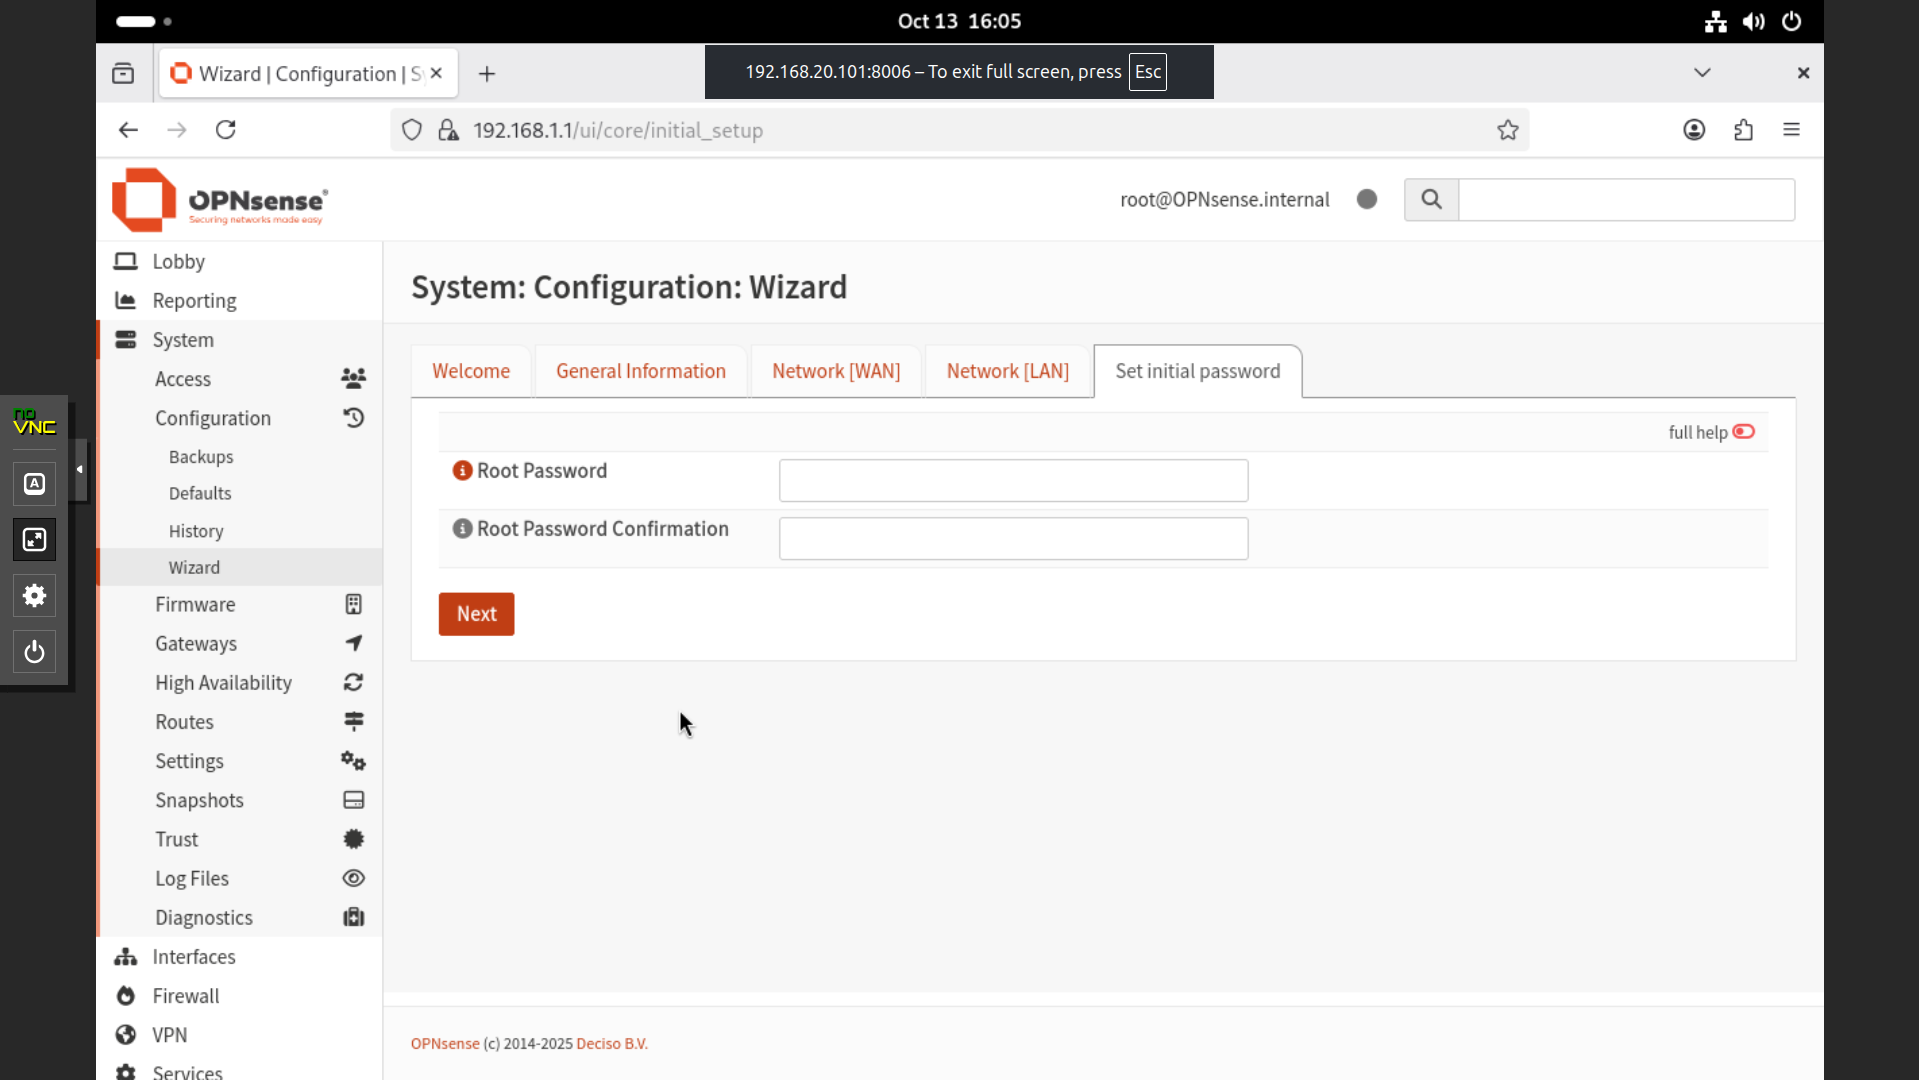
- Since the root password has already been set, skip this step and click “Next.”
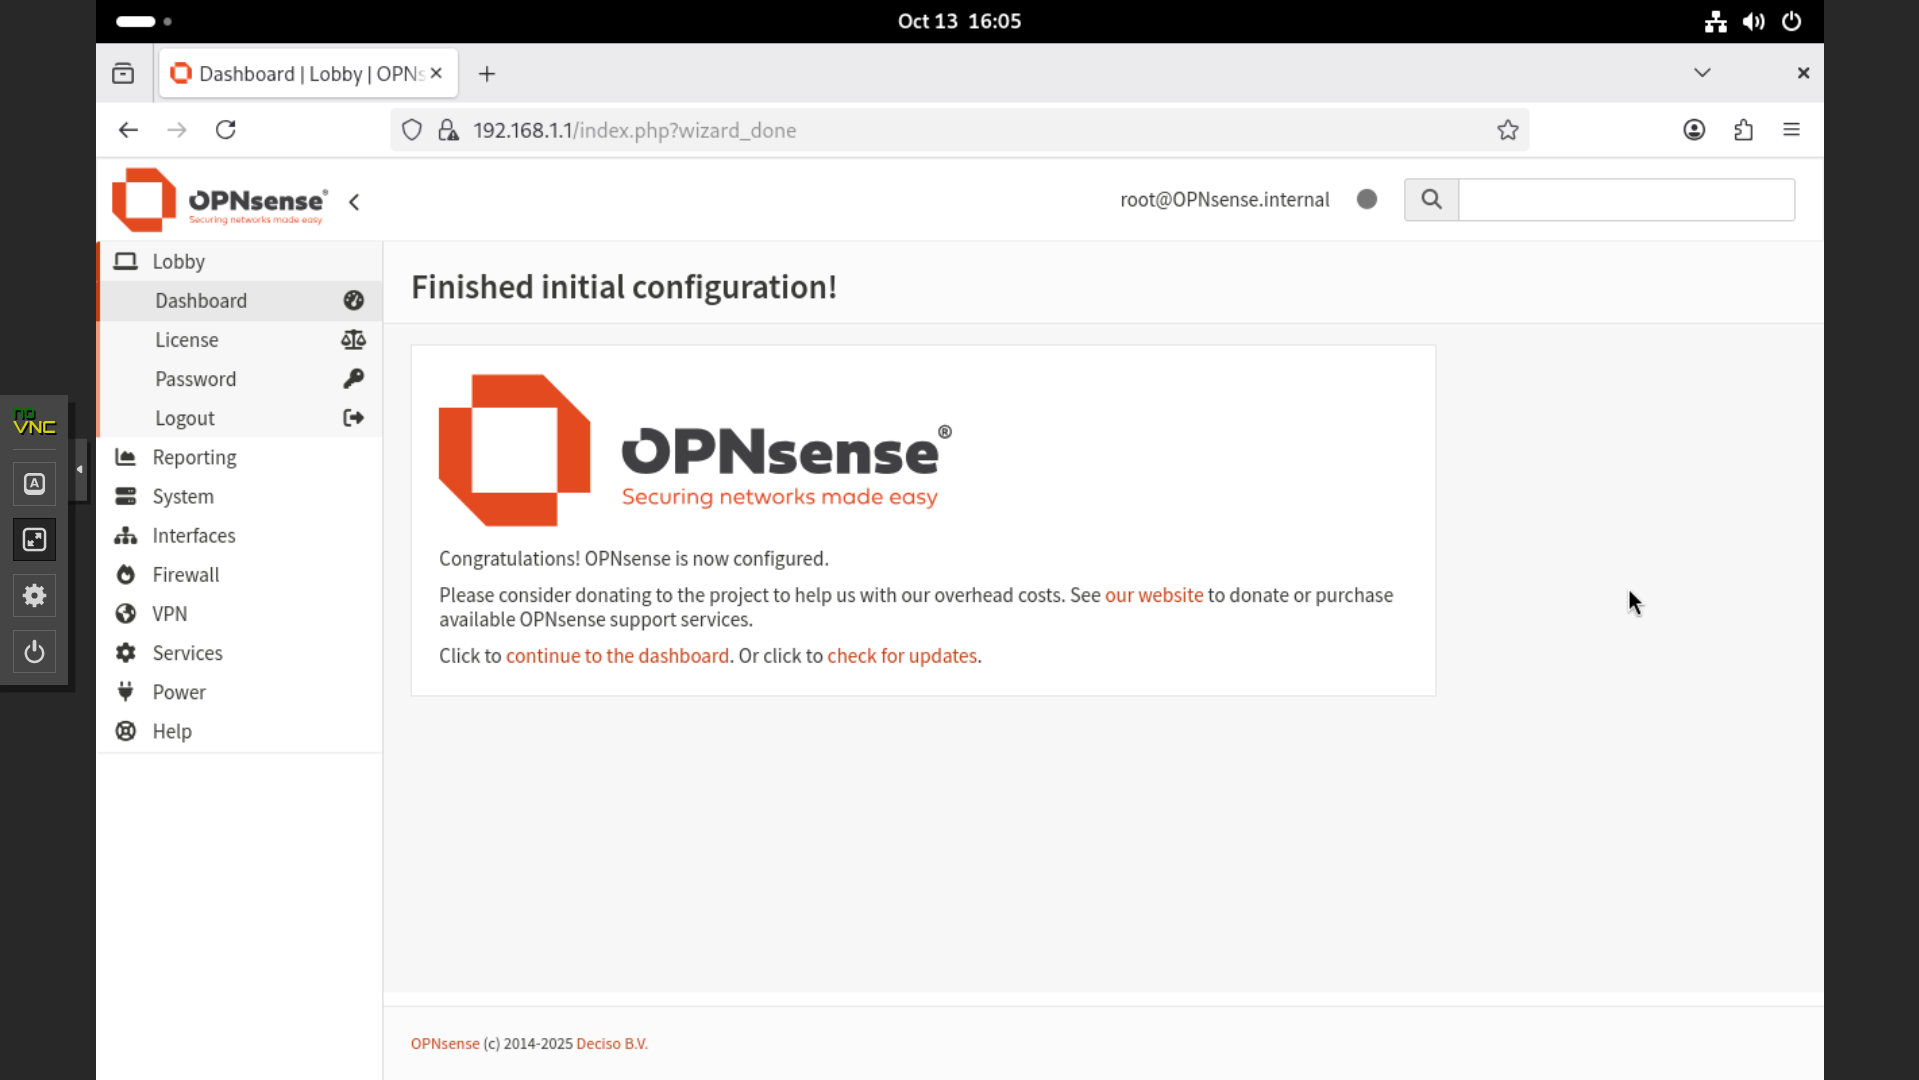
- The initial configuration is now complete.
Creating VLANs for Security Tools and Services
Now that the initial OPNsense setup is complete, the next step is to create VLANs to segment network traffic for security tools and internal services. VLANs (Virtual Local Area Networks) help isolate different types of network traffic within the same physical infrastructure, improving both security and management efficiency.
In this section, we’ll configure VLANs in OPNsense that will be used later for deploying tools like Wazuh and other monitoring services.
- After logging into the OPNsense web interface, you’ll arrive at the Dashboard. Under Gateway, you can see that both
WAN_DHCP6andWAN_DHCPare active, indicating that IPv4 and IPv6 gateways are functioning correctly. In the Services section, you’ll notice that ISC DHCPv6 Server and DNSmasq DNS/DHCP are running.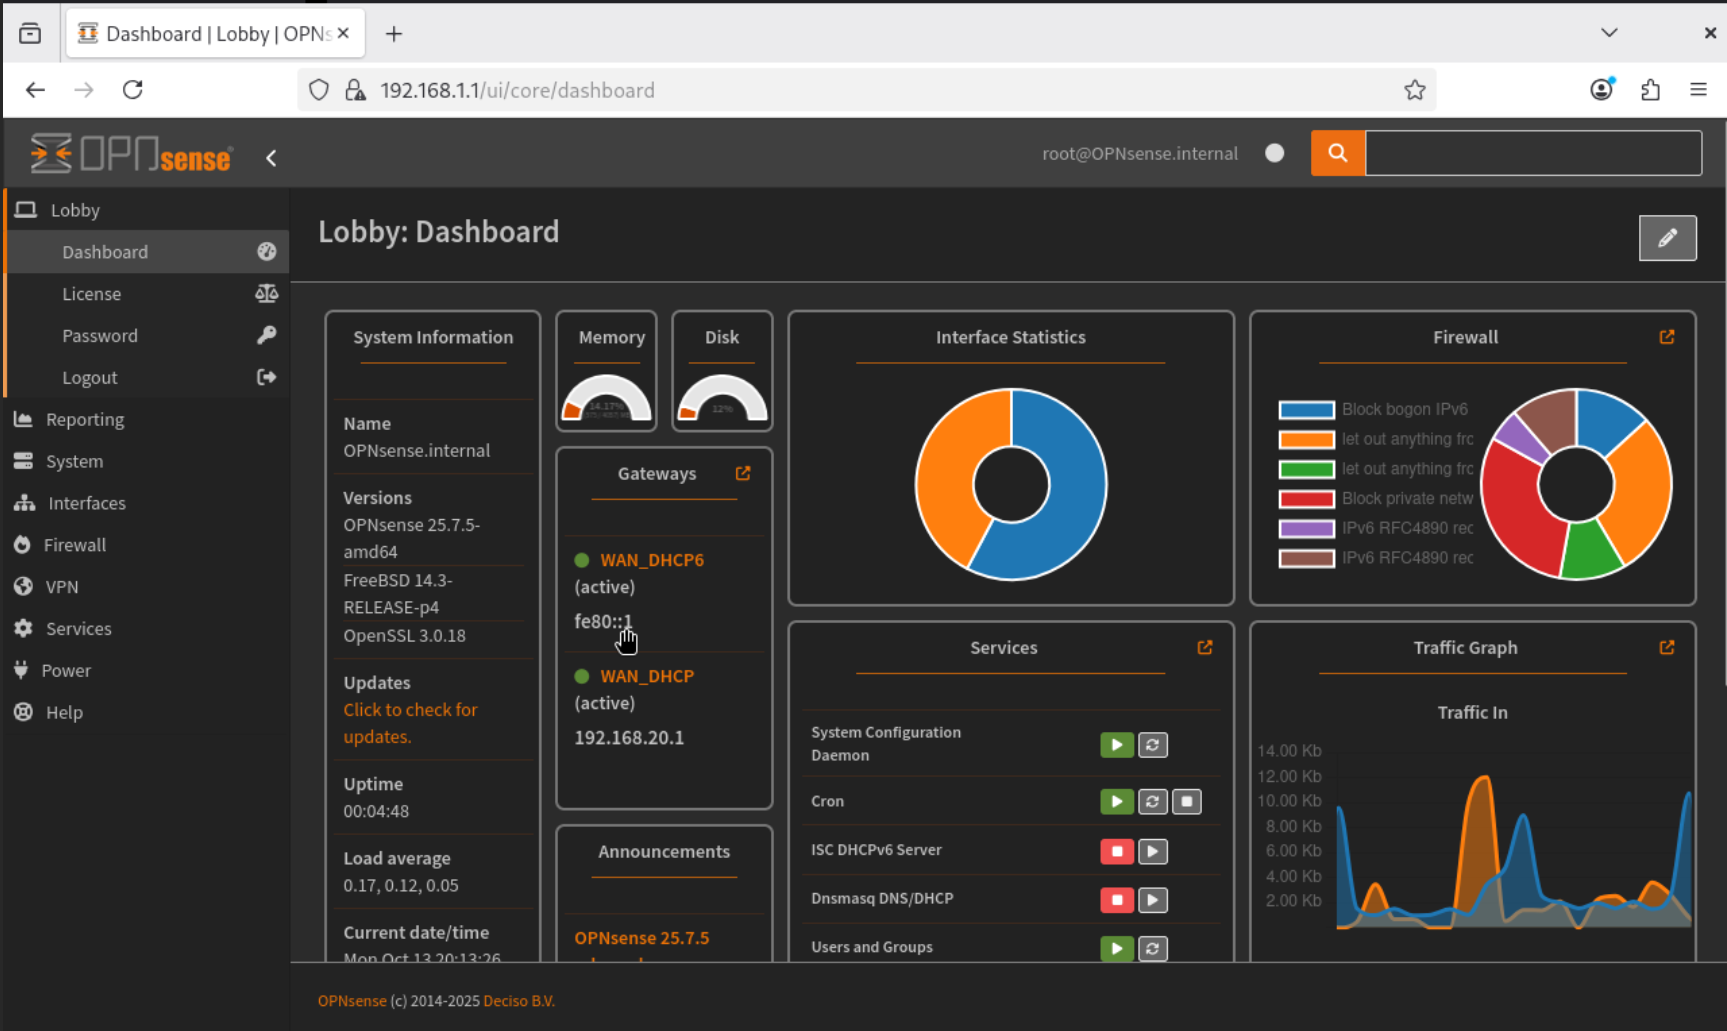
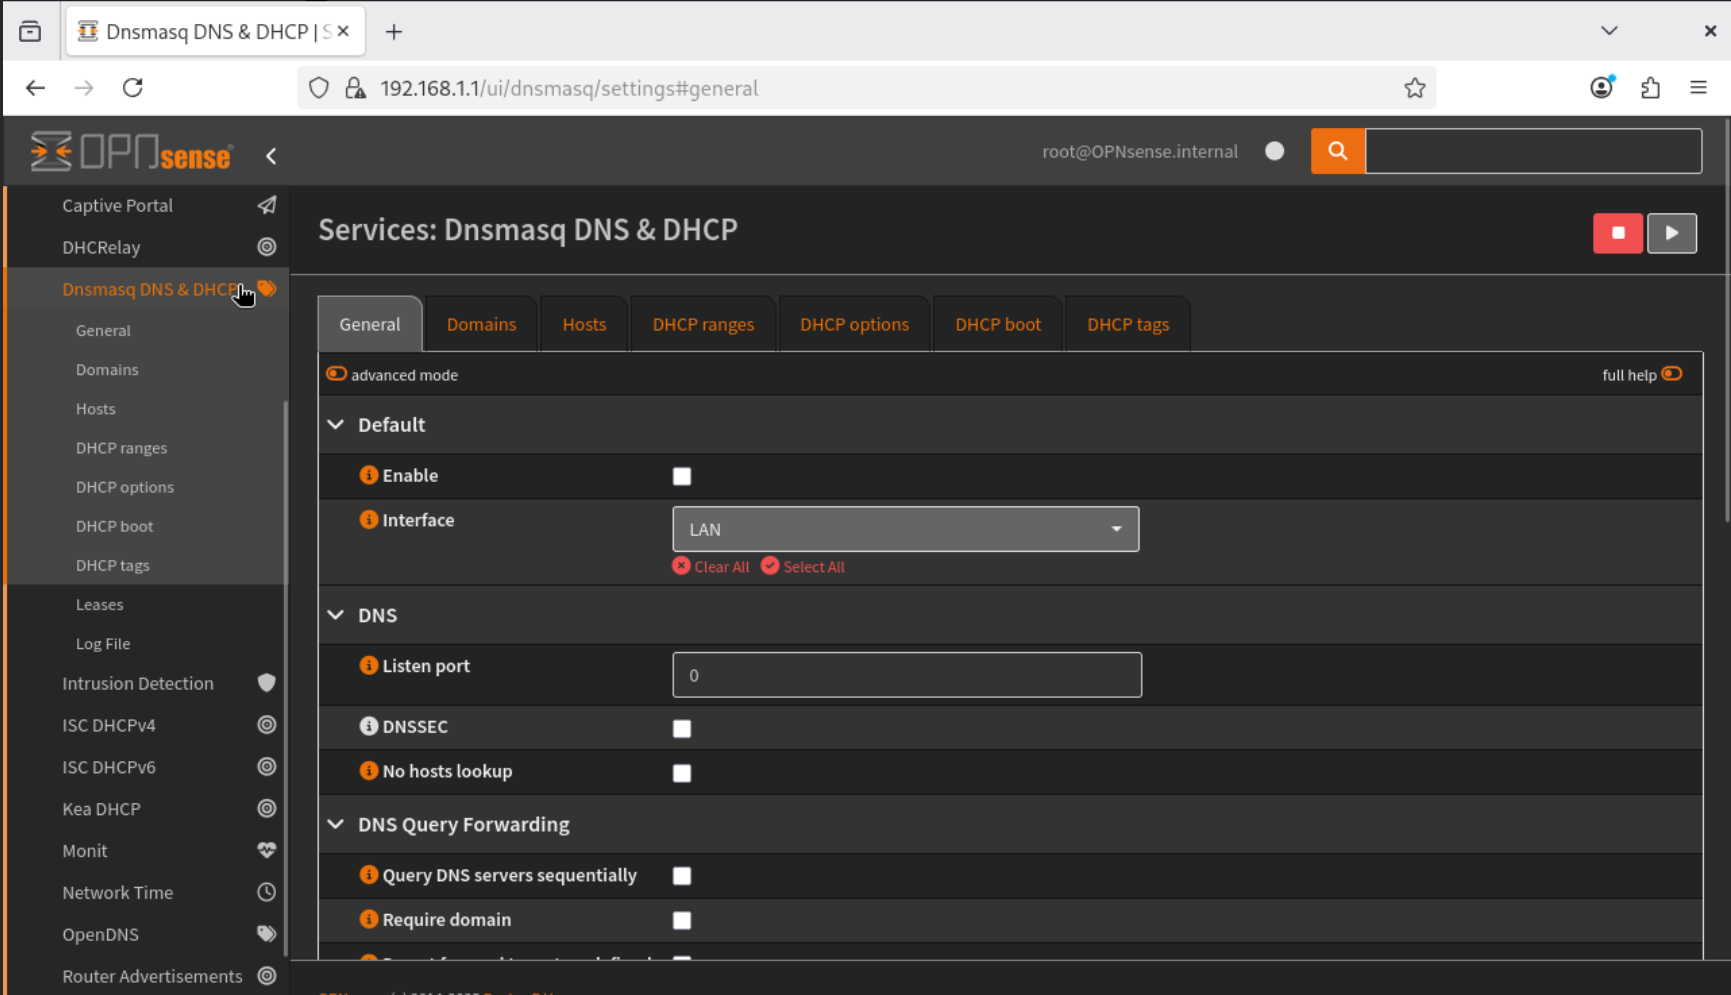
- To create a VLAN, we first need to disable the LAN interface under DNSmasq DNS/DHCP and then enable it under ISC DHCPv4. Note that both services cannot run simultaneously.
- Navigate to Services → DNSmasq DNS & DHCP → General, and stop the service running on the LAN interface.
- Next, go to Services → ISC DHCPv4 → LAN. Enable the DHCP server on the LAN interface and set the address range from
192.168.1.10to192.168.1.245. Save and apply the configuration to start the ISC DHCPv4 service.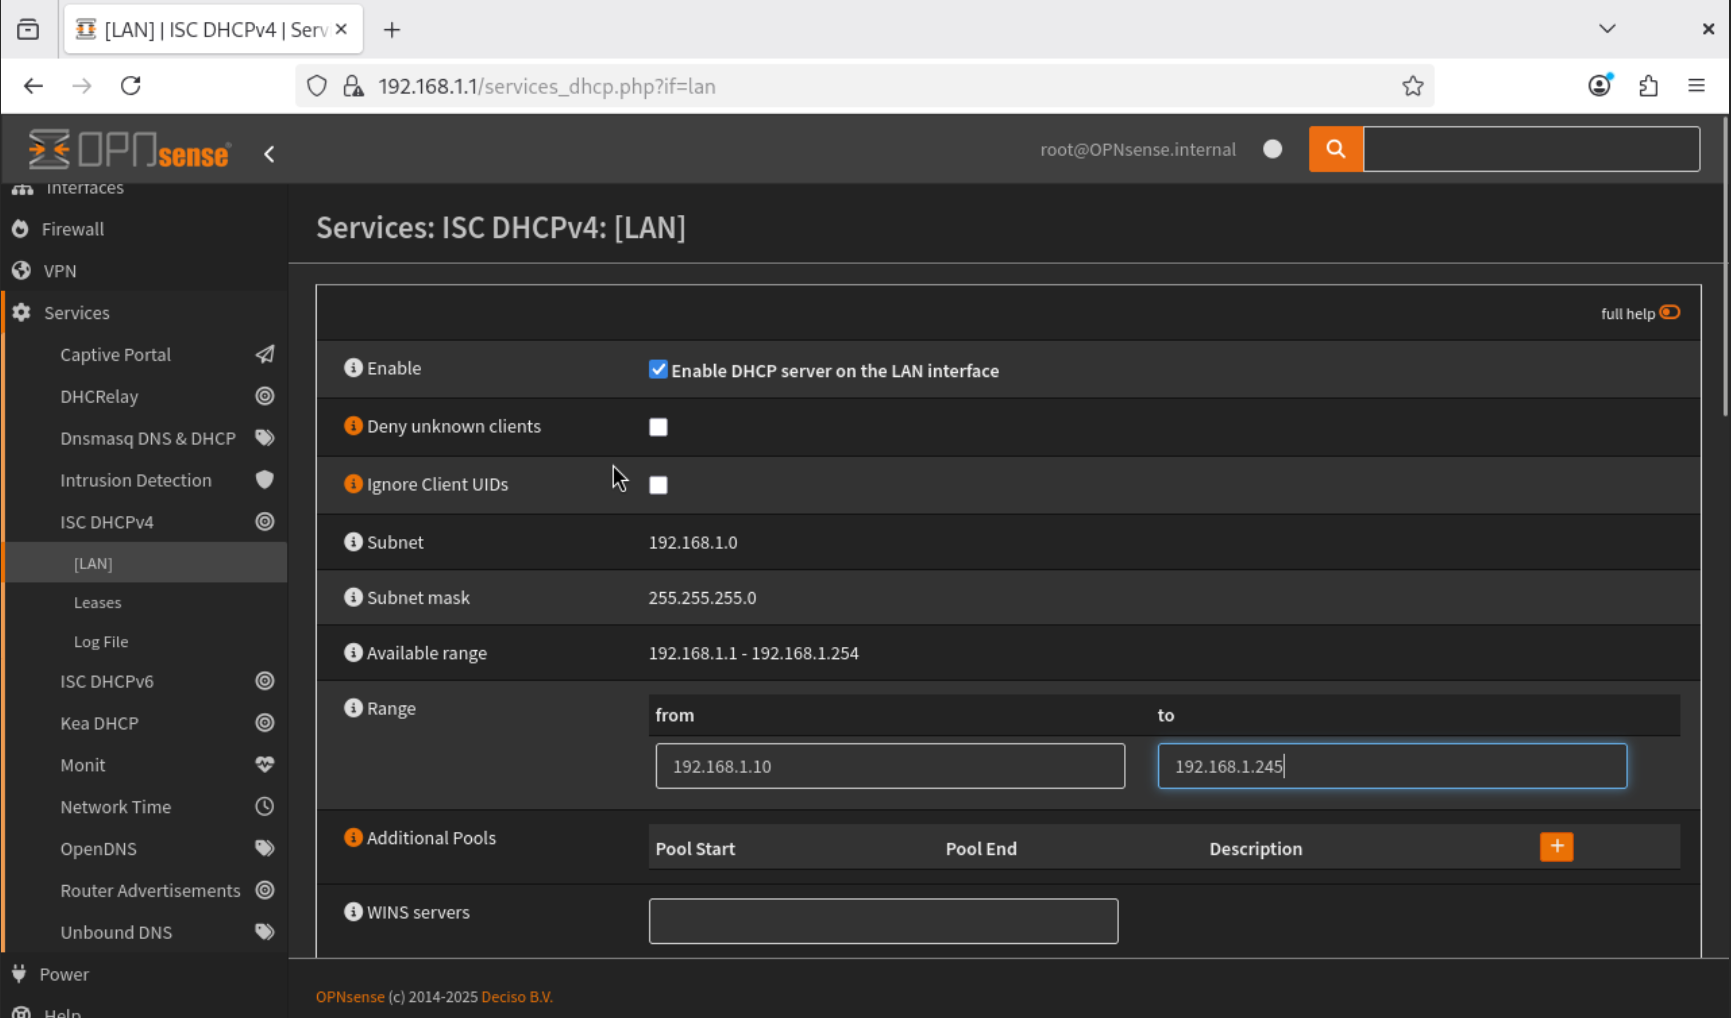
- To create a VLAN, navigate to Interfaces → Devices → VLAN.
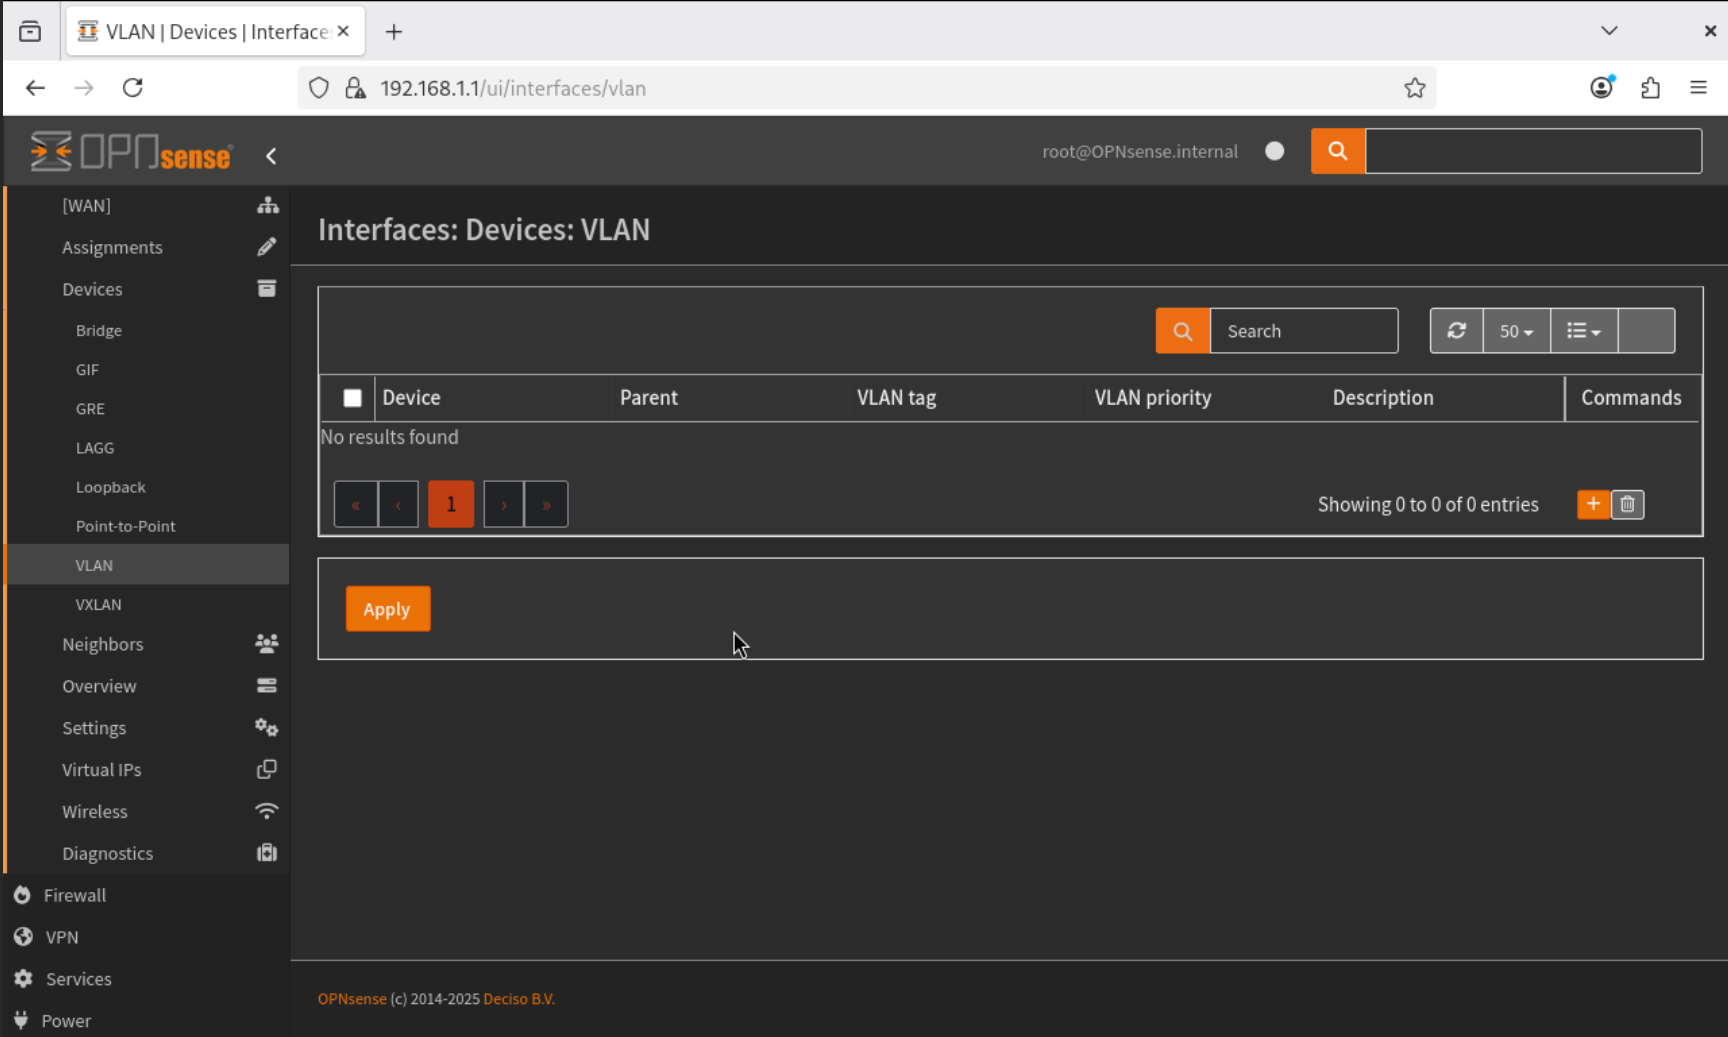
- Click Add, and configure the following:
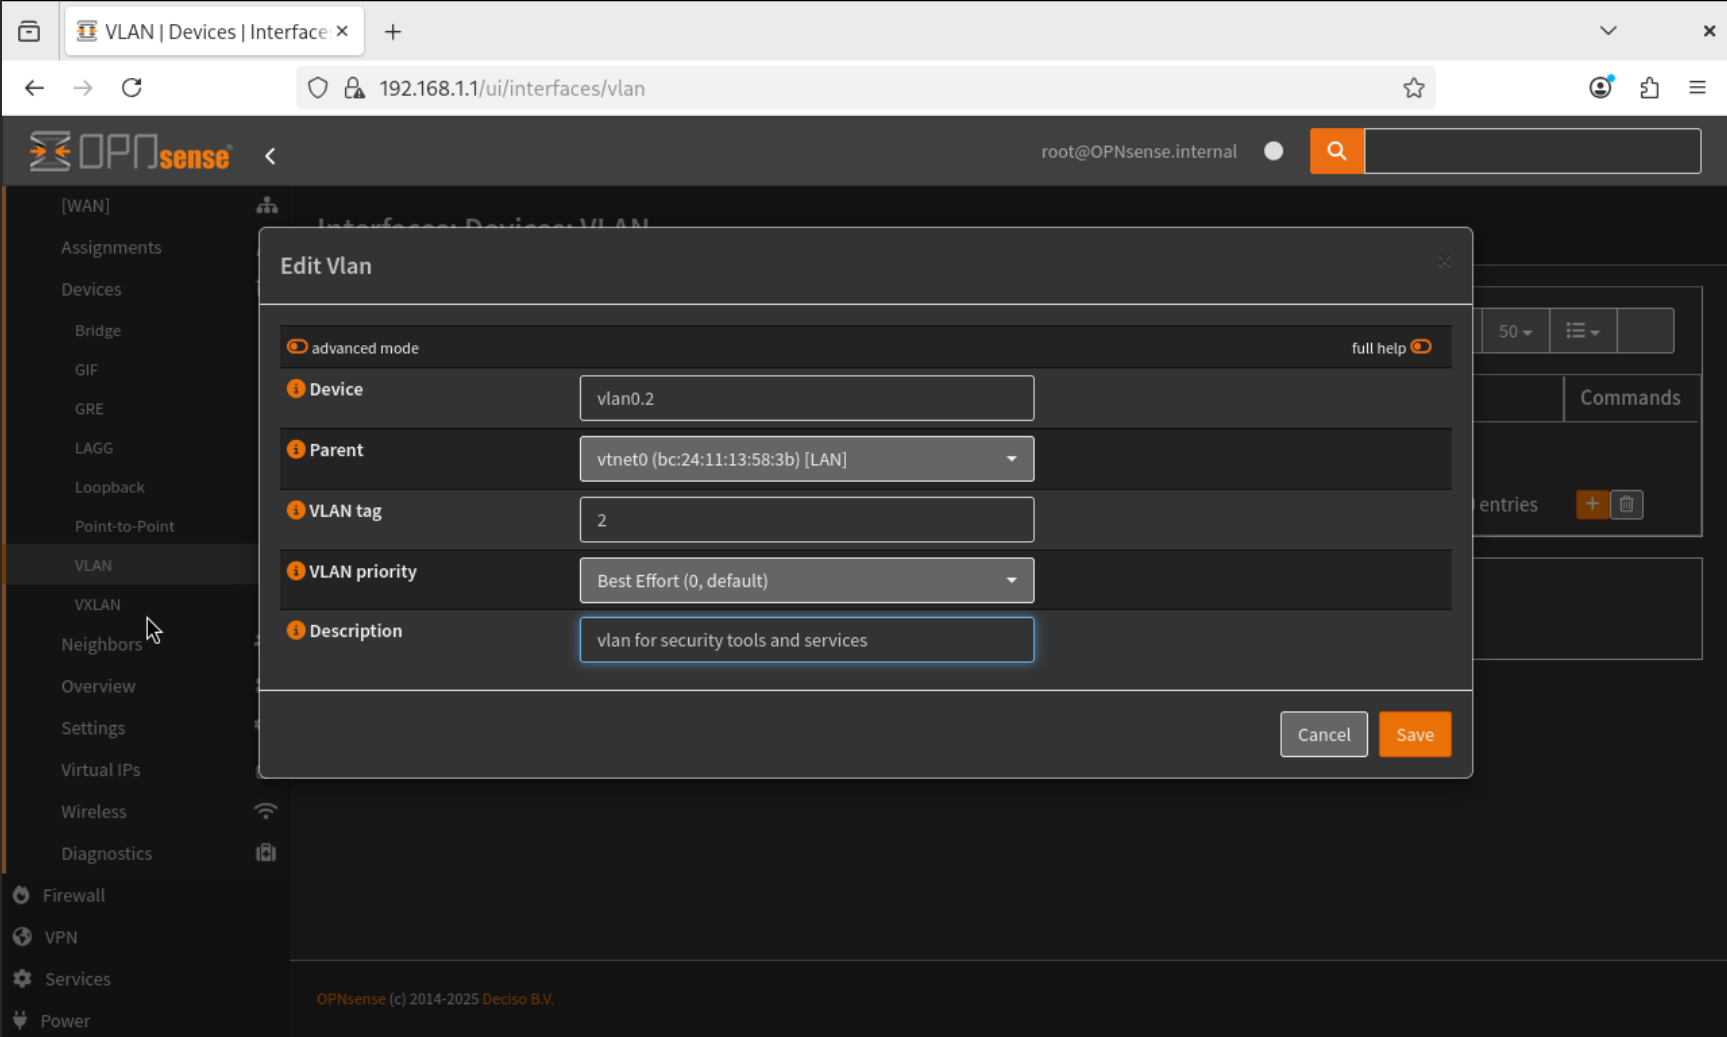
- Device Name:
vlan0.2 - VLAN Tag:
2 - Description: VLAN for Security Tools and Services
- Leave the remaining settings as default and save the configuration.
- Device Name:
- Go to Interfaces → Assignments, add the newly created VLAN interface (
vlan0.2), and name itSecTools.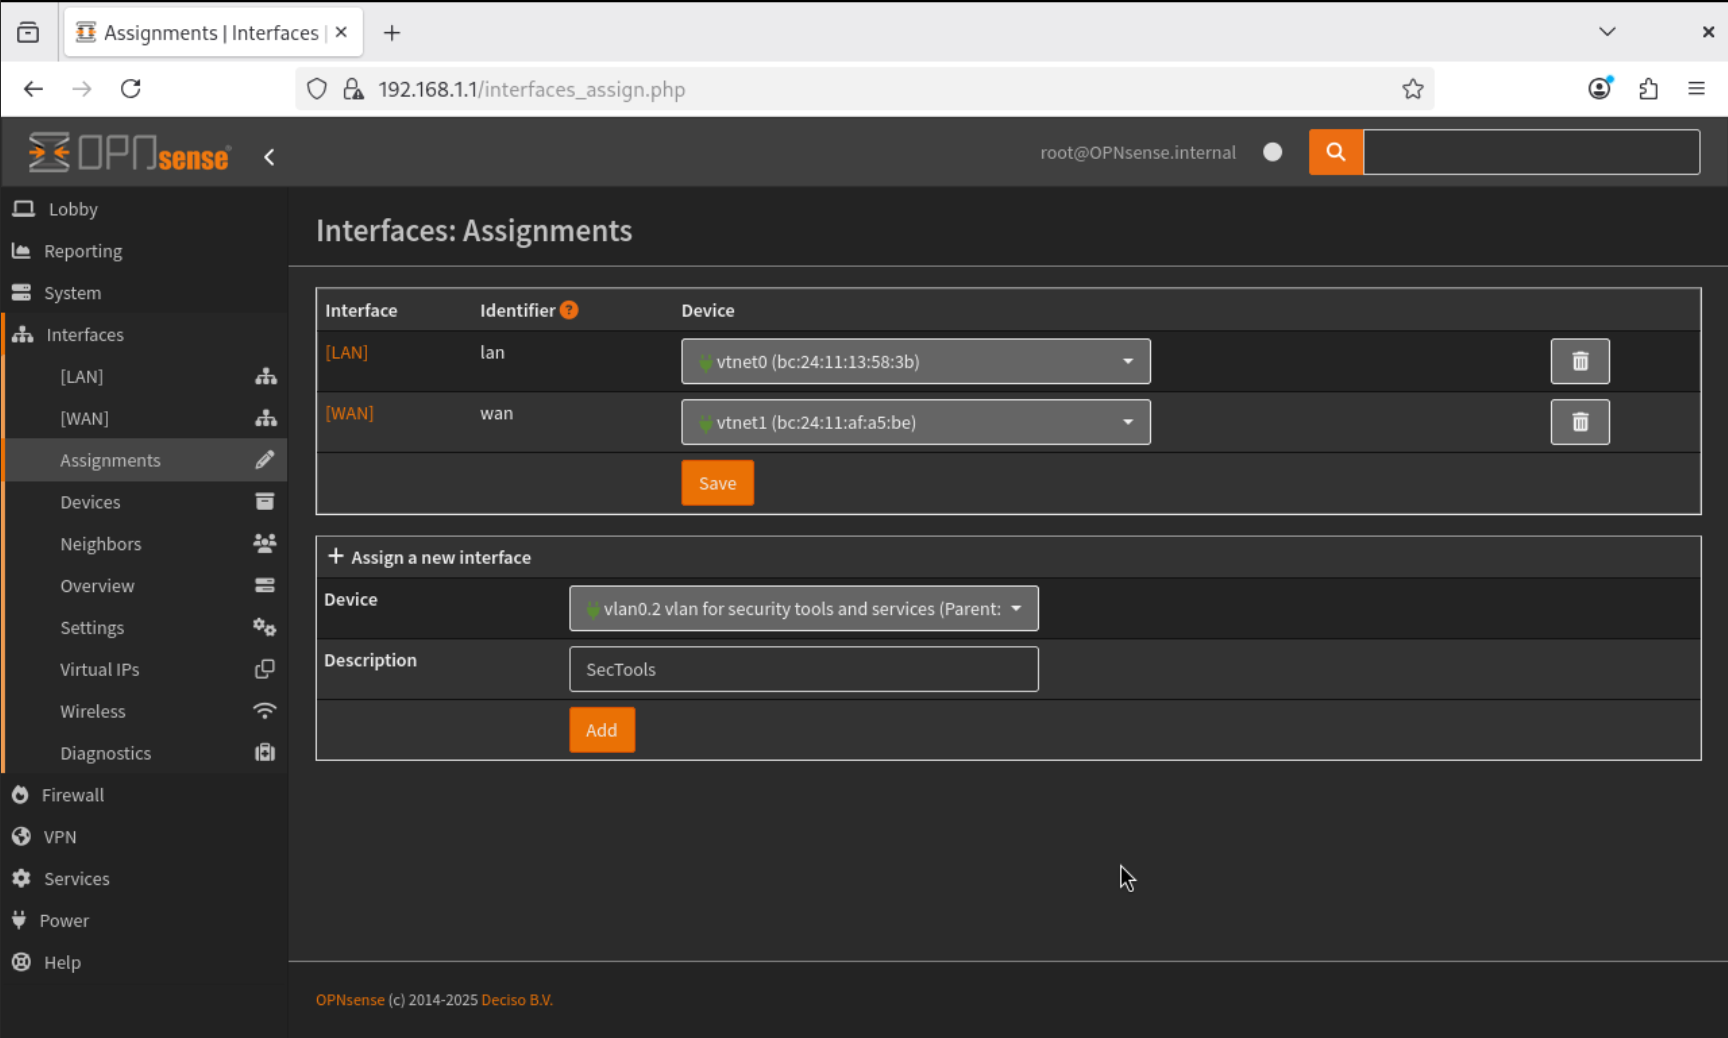
- Navigate to Interfaces → SecTools, enable the interface, and configure it with a Static IPv4 Address of
192.168.2.1/24. Save the configuration.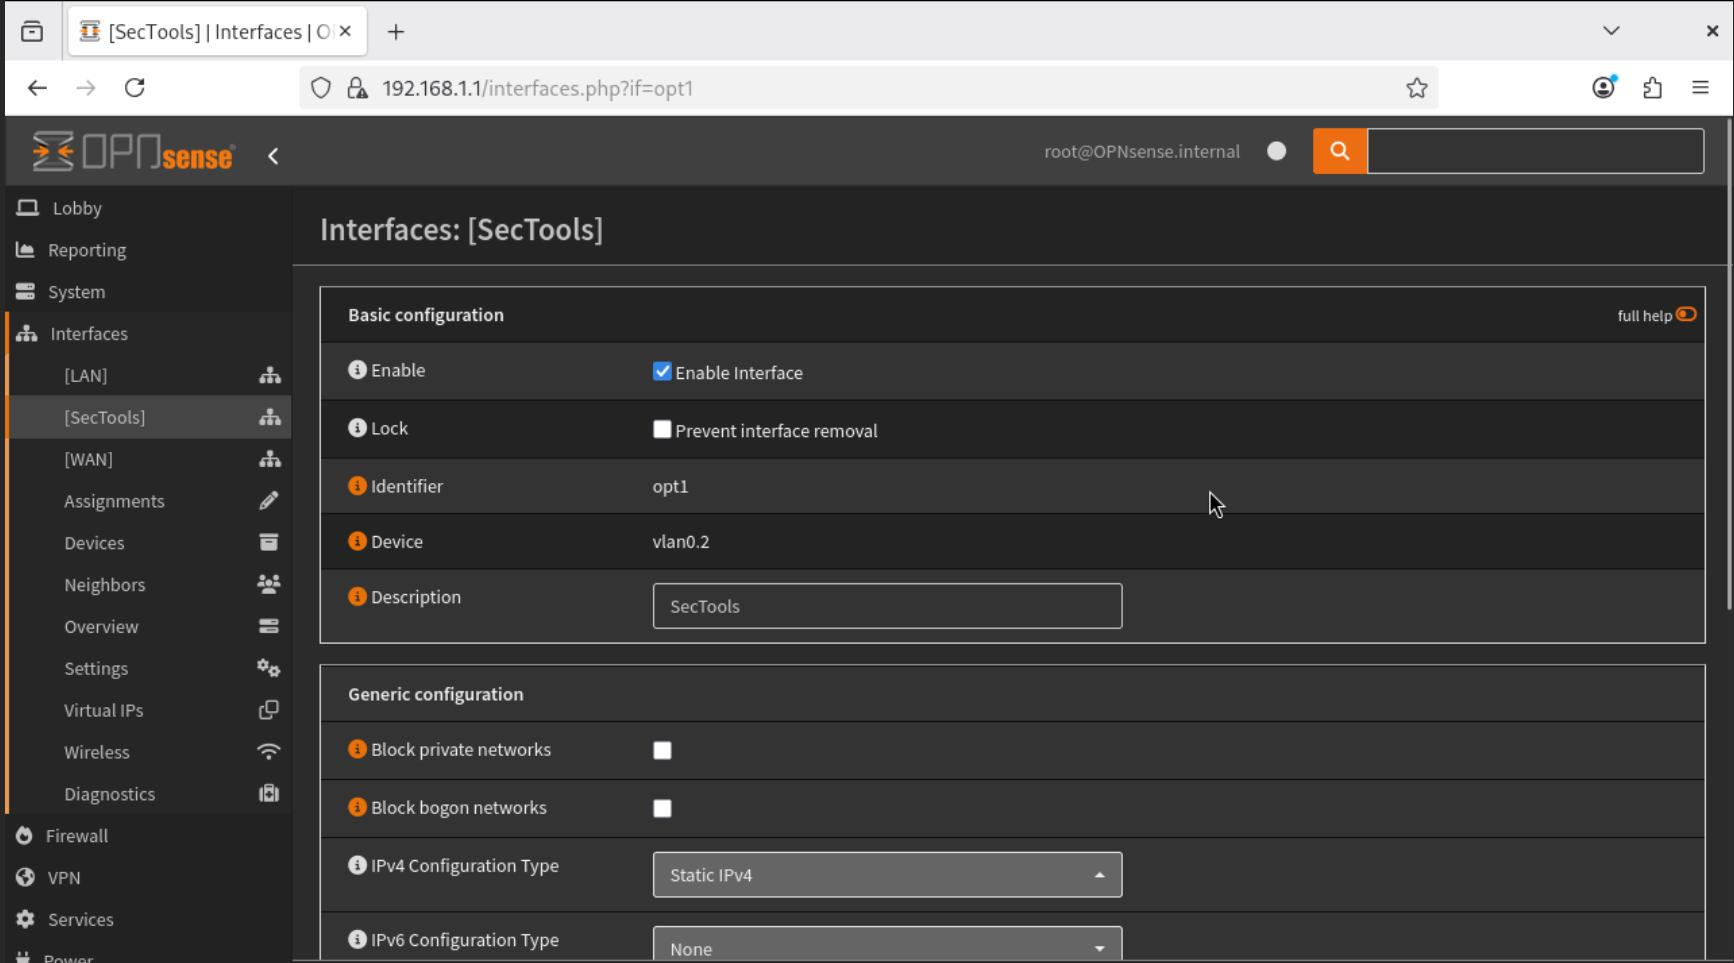

- Under Services → ISC DHCPv4 → SecTools, enable the DHCP server for this VLAN interface.
- Set the address range:
192.168.2.10to192.168.2.245 - Gateway:
192.168.2.1 - Save the configuration.
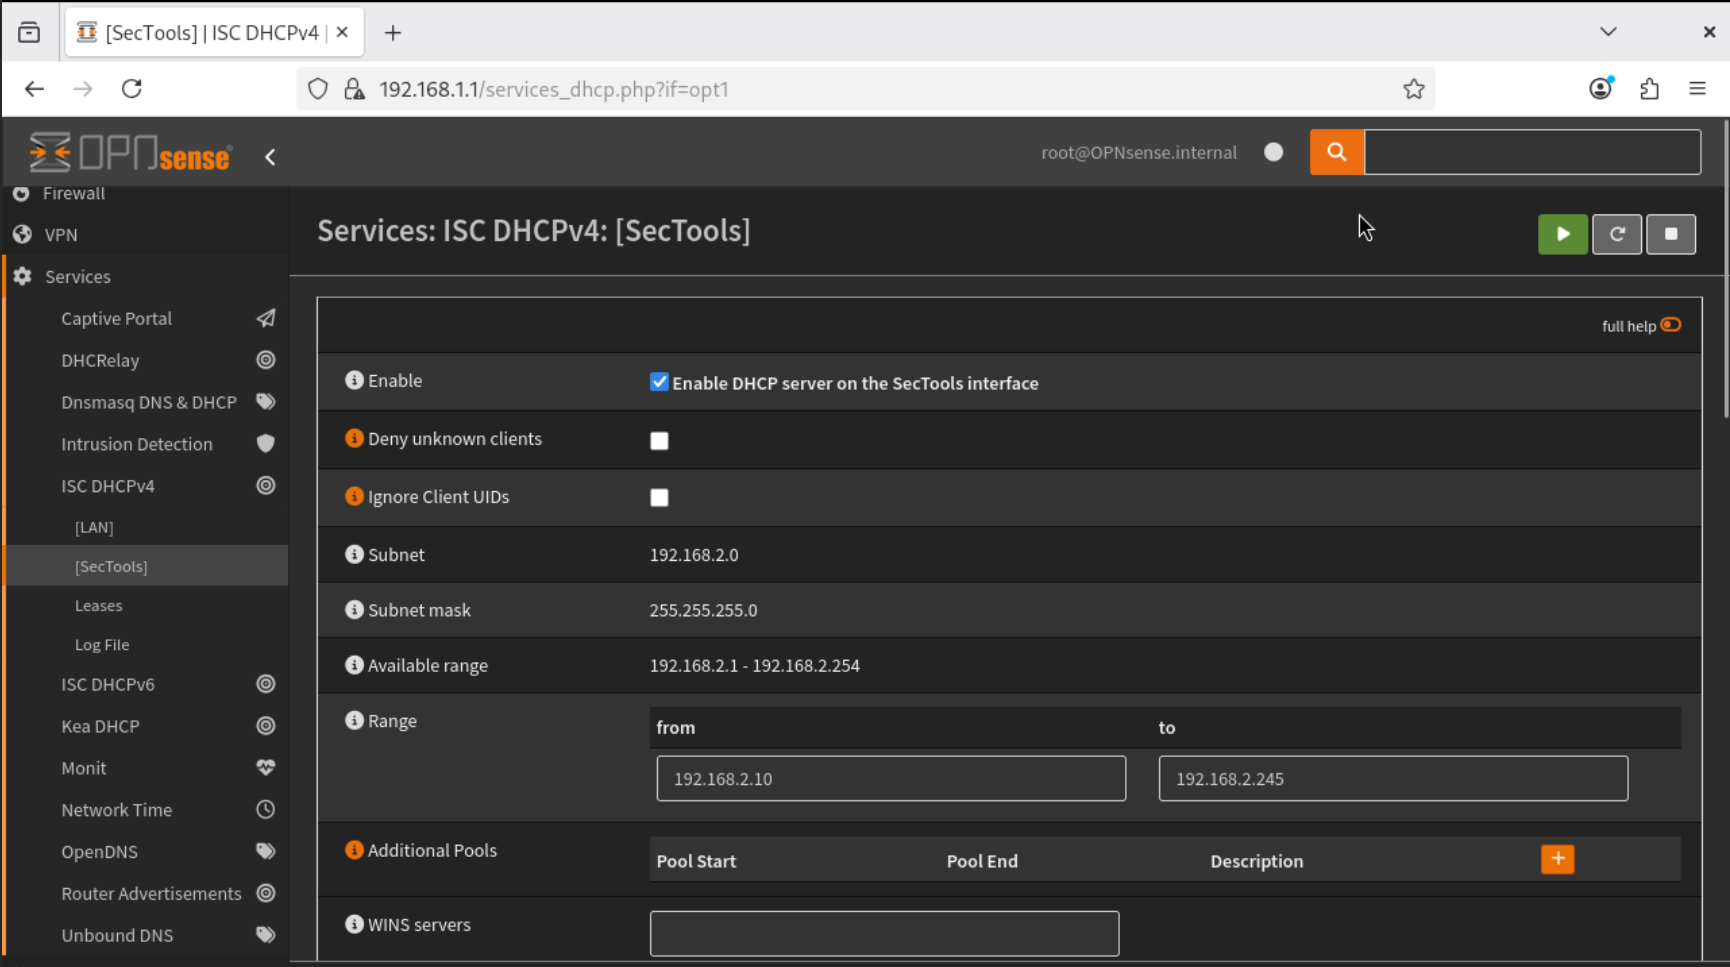

- Set the address range:
- If a static IP is required for specific devices, add their MAC addresses under DHCP Static Mappings within the required interface (ie. SecTools). This allows the DHCP server to always assign the same IP address to that device.
Conclusion
We successfully configured OPNsense by completing its setup wizard and creating VLANs to separate security services from general traffic. With this structure in place, the lab network is now organized, secure, and ready for deploying monitoring and security tools in the next phase.In this chapter, we completed the initial configuration of OPNsense, including setting the hostname, DNS servers, and verifying the LAN and WAN interfaces.
Up Next
In the next chapter, we will deploy the Wazuh server, a free and open-source security monitoring platform, within Proxmox. This server will collect logs and monitor security events from endpoints across the internal network.