Chapter 6 - Enabling Opnsense GUI Access from the WAN
Enabling Opnsense Dashboard access from the WAN.

Introduction
Currently, the OPNsense GUI is accessible only from the internal Debian admin VM. In this chapter, we will configure firewall rules and routing settings to enable direct, secure access to OPNsense from the WAN, making remote management easier and more efficient.
Prerequisites
- OPNsense deployed and accessible from the internal admin Debian VM.
- WAN IP assigned to OPNsense and reachable from your home network.
Note: To assign a static IP to the OPNsense firewall on the home network, sign in to the Wi-Fi router’s admin panel. Locate the MAC address of the OPNsense firewall VM in the network section of Proxmox. Using this MAC address, create a static IP reservation in the router so that the firewall always receives the same IP.
Creating a WAN Firewall Rule on OPNsense
Steps
- Go to Firewall → Rules → WAN.
- Add a new rule:
- Action: Pass
- Interface: WAN
- Protocol: TCP
- Source: WAN net (192.168.20.0/24)
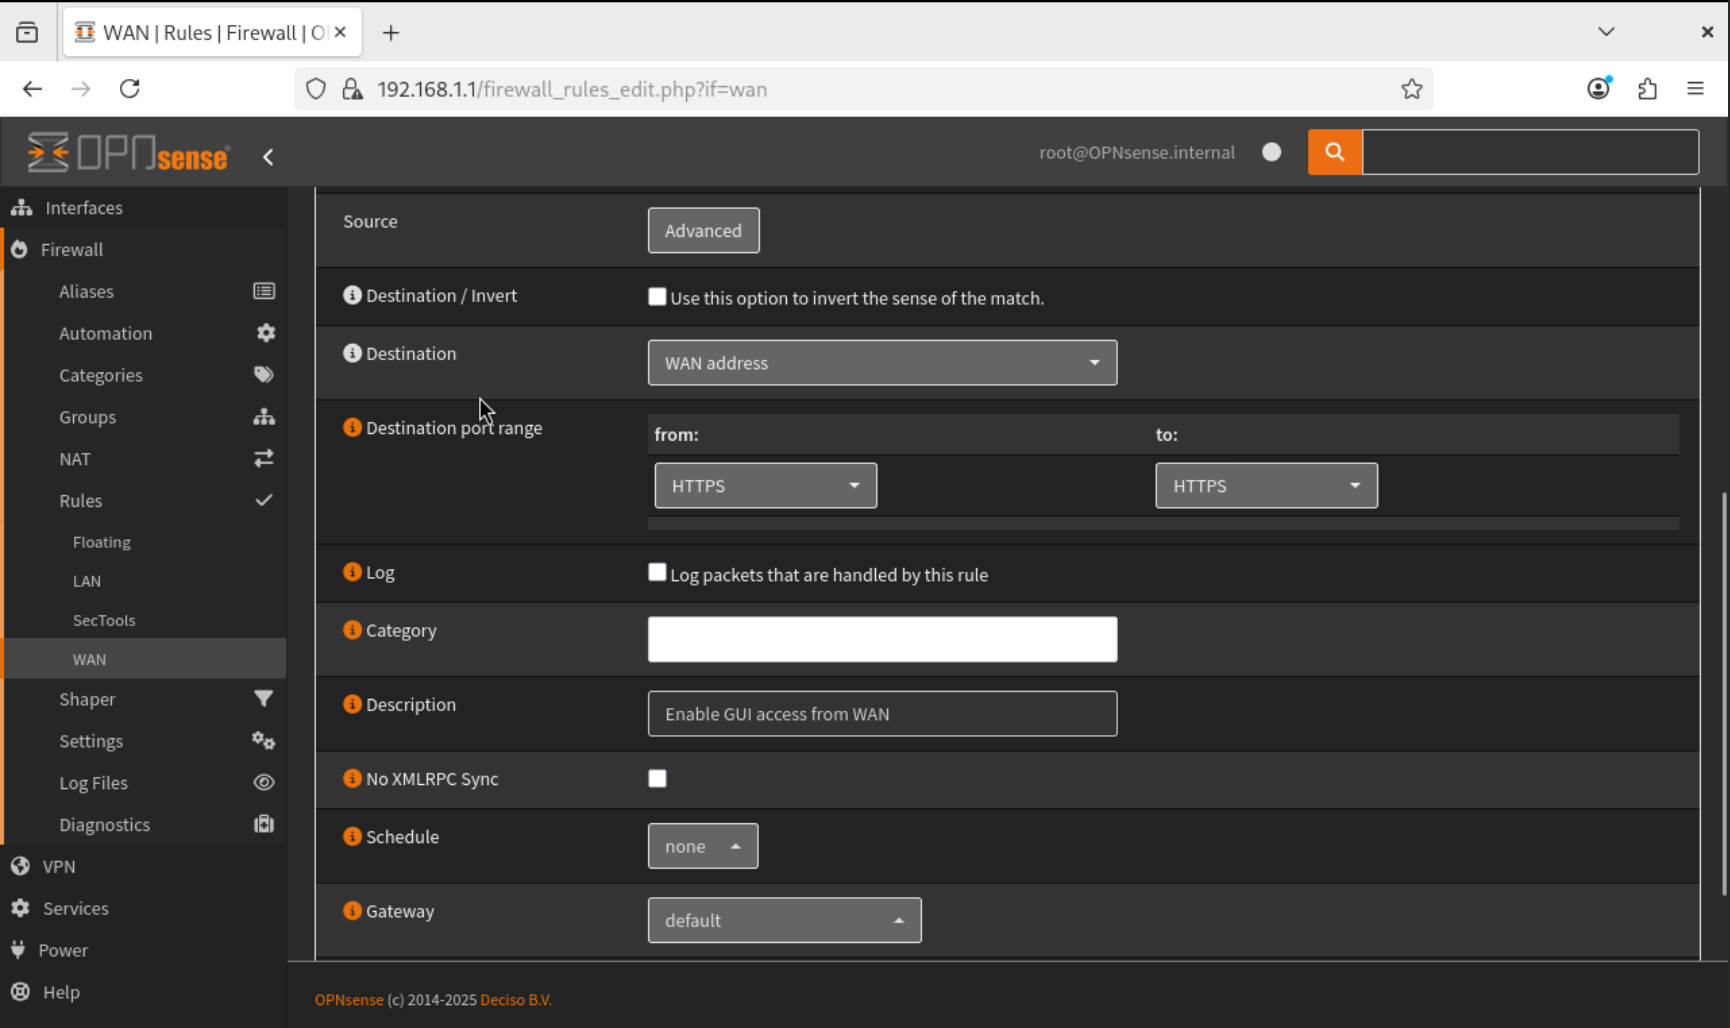
- Destination: WAN address (192.168.20.2/24)
- Destination Port: HTTPS (443)
- Description: Enable GUI access from WAN
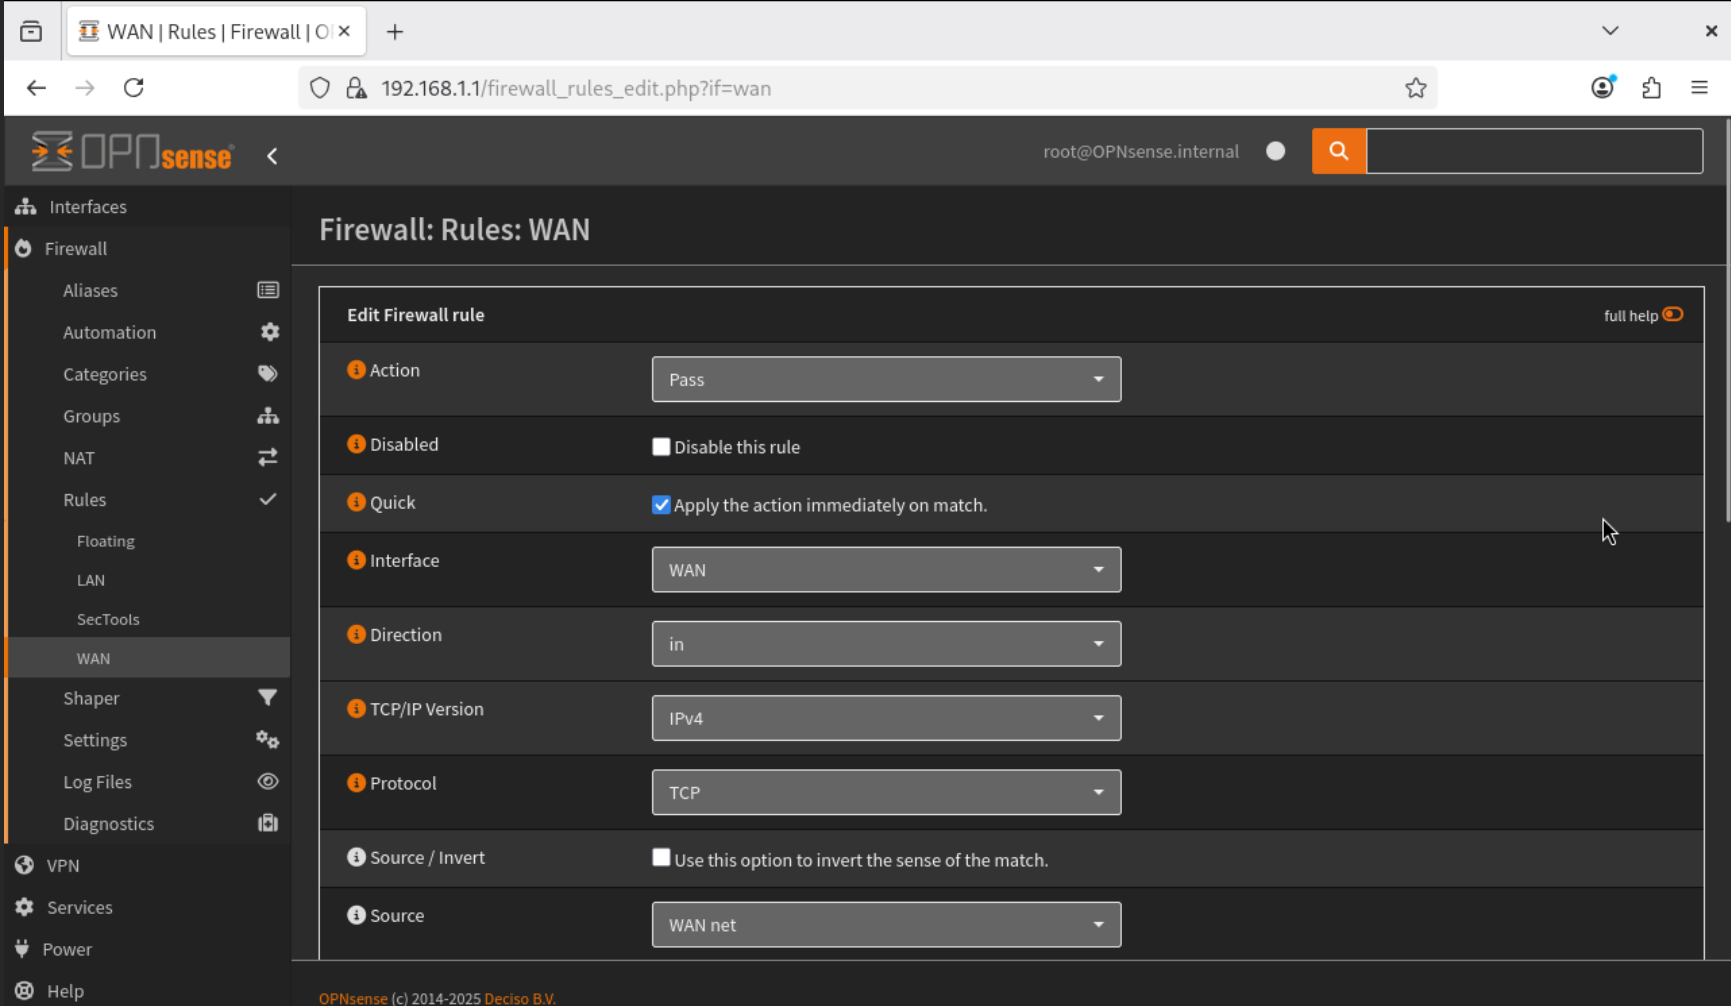
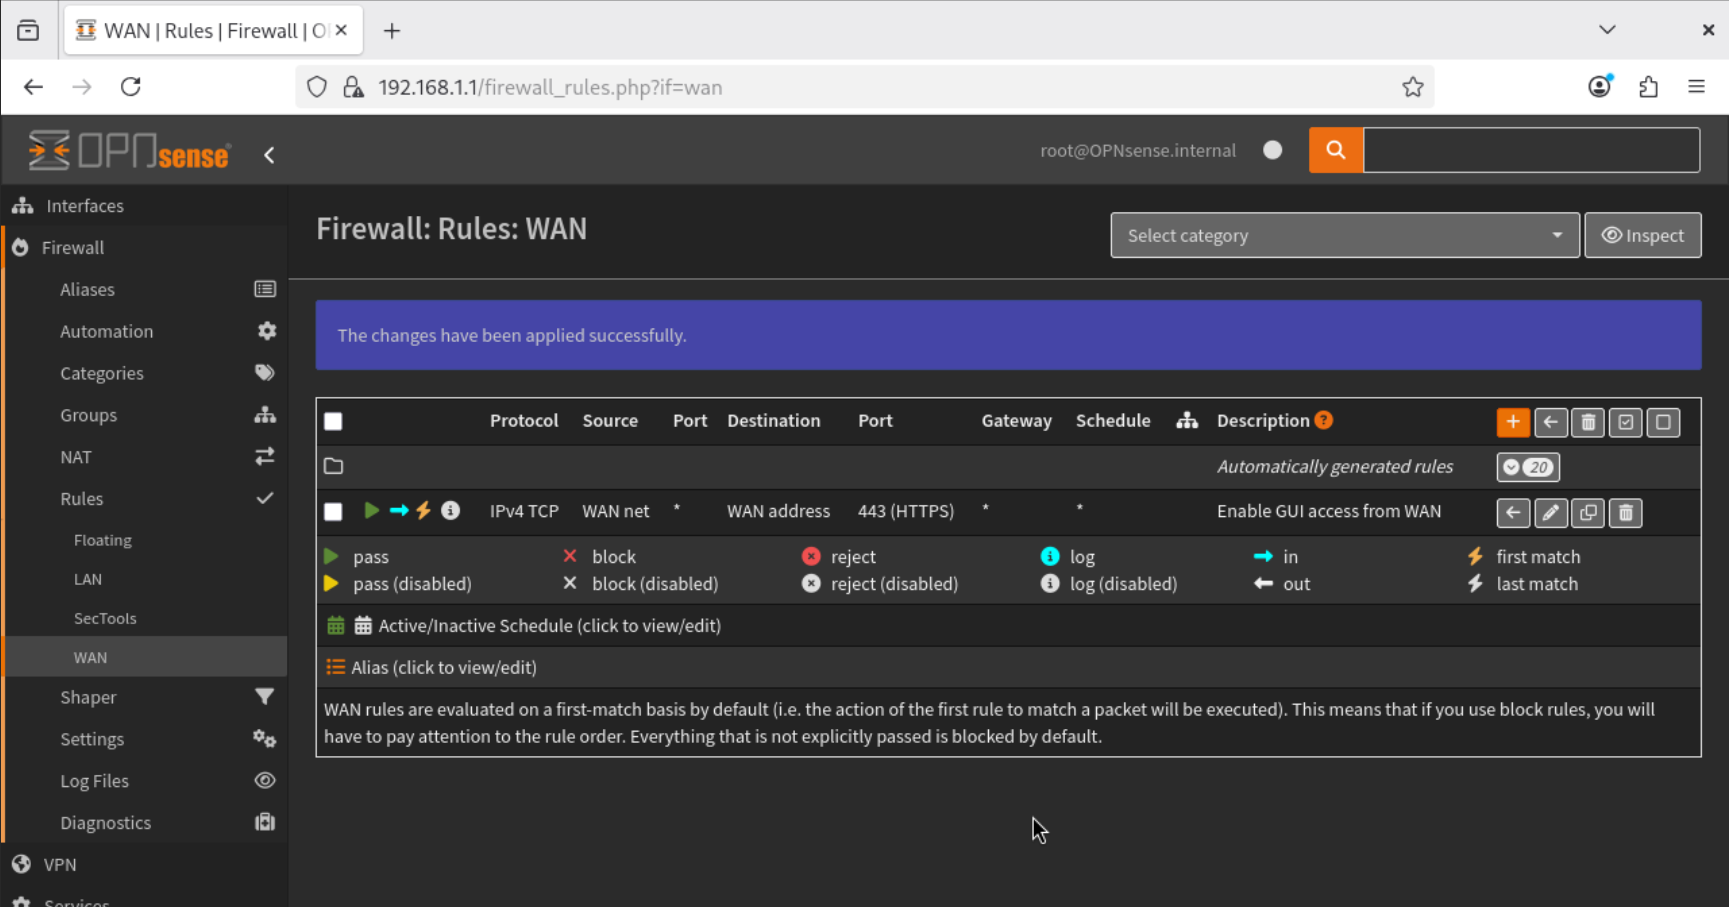
- Save and apply the rule.
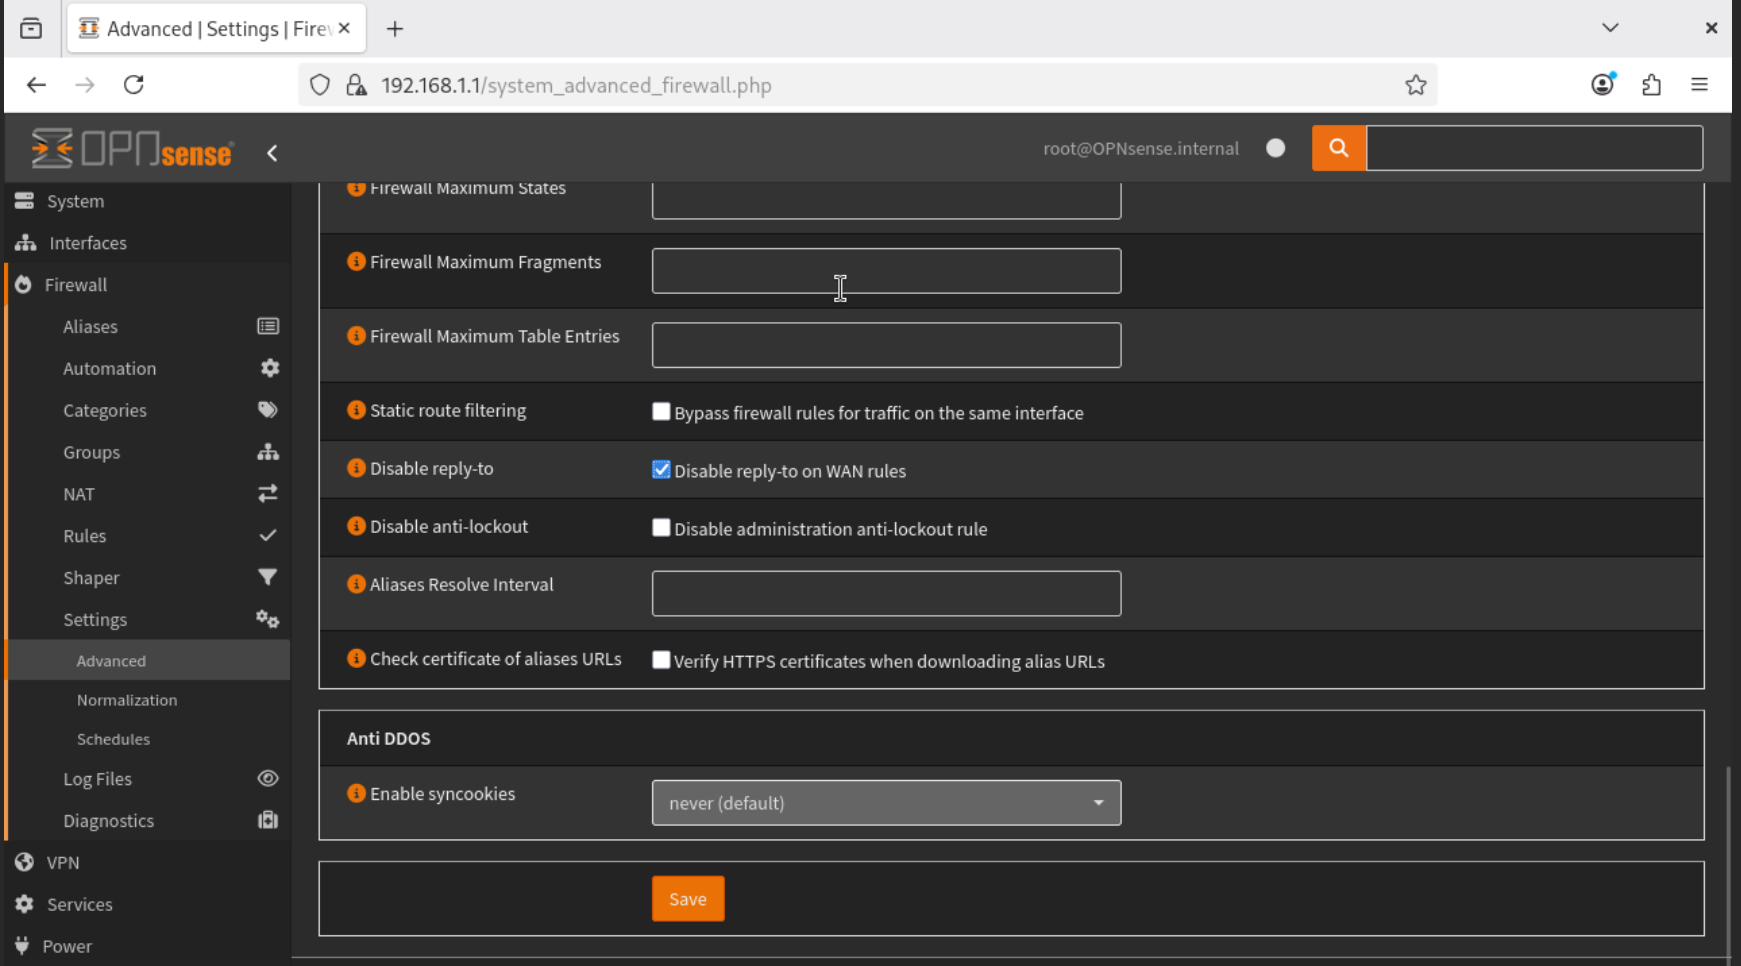
- Navigate to Firewall → Settings → Advanced, and Enable Disable Reply-to. This ensures stable remote access.
This configuration securely allows only HTTPS traffic from our home network to reach the OPNsense GUI.
Detailed explanation for enabling “disable reply-to” on WAN rule
The “Disable reply-to” option was enabled on the WAN firewall rule to allow reliable access to the OPNsense web GUI from an external network (home network).
Default behavior with reply-to enabled When reply-to is enabled (the default), OPNsense automatically forces return traffic to exit through the same interface that the request arrived on. This mechanism is primarily designed for multi-WAN environments, where the firewall must ensure that responses leave via the same WAN interface to avoid asymmetric routing issues.
Traffic flow with reply-to enabled:
- A request to access the OPNsense GUI is sent from an external device (home network) to the WAN IP.
- The packet enters OPNsense via the WAN interface.
- The firewall applies the reply-to directive, marking the reply traffic to exit via the same WAN interface.
- The reply is sent using the WAN’s gateway, i.e. 192.168.20.1, according to the reply-to directive.
- Because the reply-to forces the route, the response may take a path that cannot reach the source device correctly.
- Result: The GUI request fails or times out, making WAN access unreliable.
This behavior is correct in multi-WAN or failover setups but problematic in a single WAN environment when accessing the GUI externally.
Behavior after disabling reply-to By enabling “Disable reply-to”, OPNsense does not force return traffic to exit the same interface. Instead, responses follow the normal system routing table, which ensures that replies are routed directly back to the source device according to the best available route.
Traffic flow with reply-to disabled:
- A request to access the OPNsense GUI is sent from the home network to the WAN IP.
- The packet enters OPNsense via the WAN interface.
- The firewall does not force the exit interface; the response uses the system routing table.
- Return traffic is correctly delivered to the home network device via the appropriate gateway.
- Result: The GUI request succeeds, and WAN access is stable and functional.
Reason for this configuration This change was made to enable remote administrative access to the OPNsense dashboard while maintaining reliable traffic flow. In a single WAN setup or when accessing the firewall from external networks, the default reply-to behavior can unintentionally block or misroute responses. Disabling reply-to ensures that:
- Responses reach the requesting device correctly.
- GUI access is stable and functional from external networks.
- The firewall’s normal routing rules are followed, avoiding unnecessary traffic forcing.
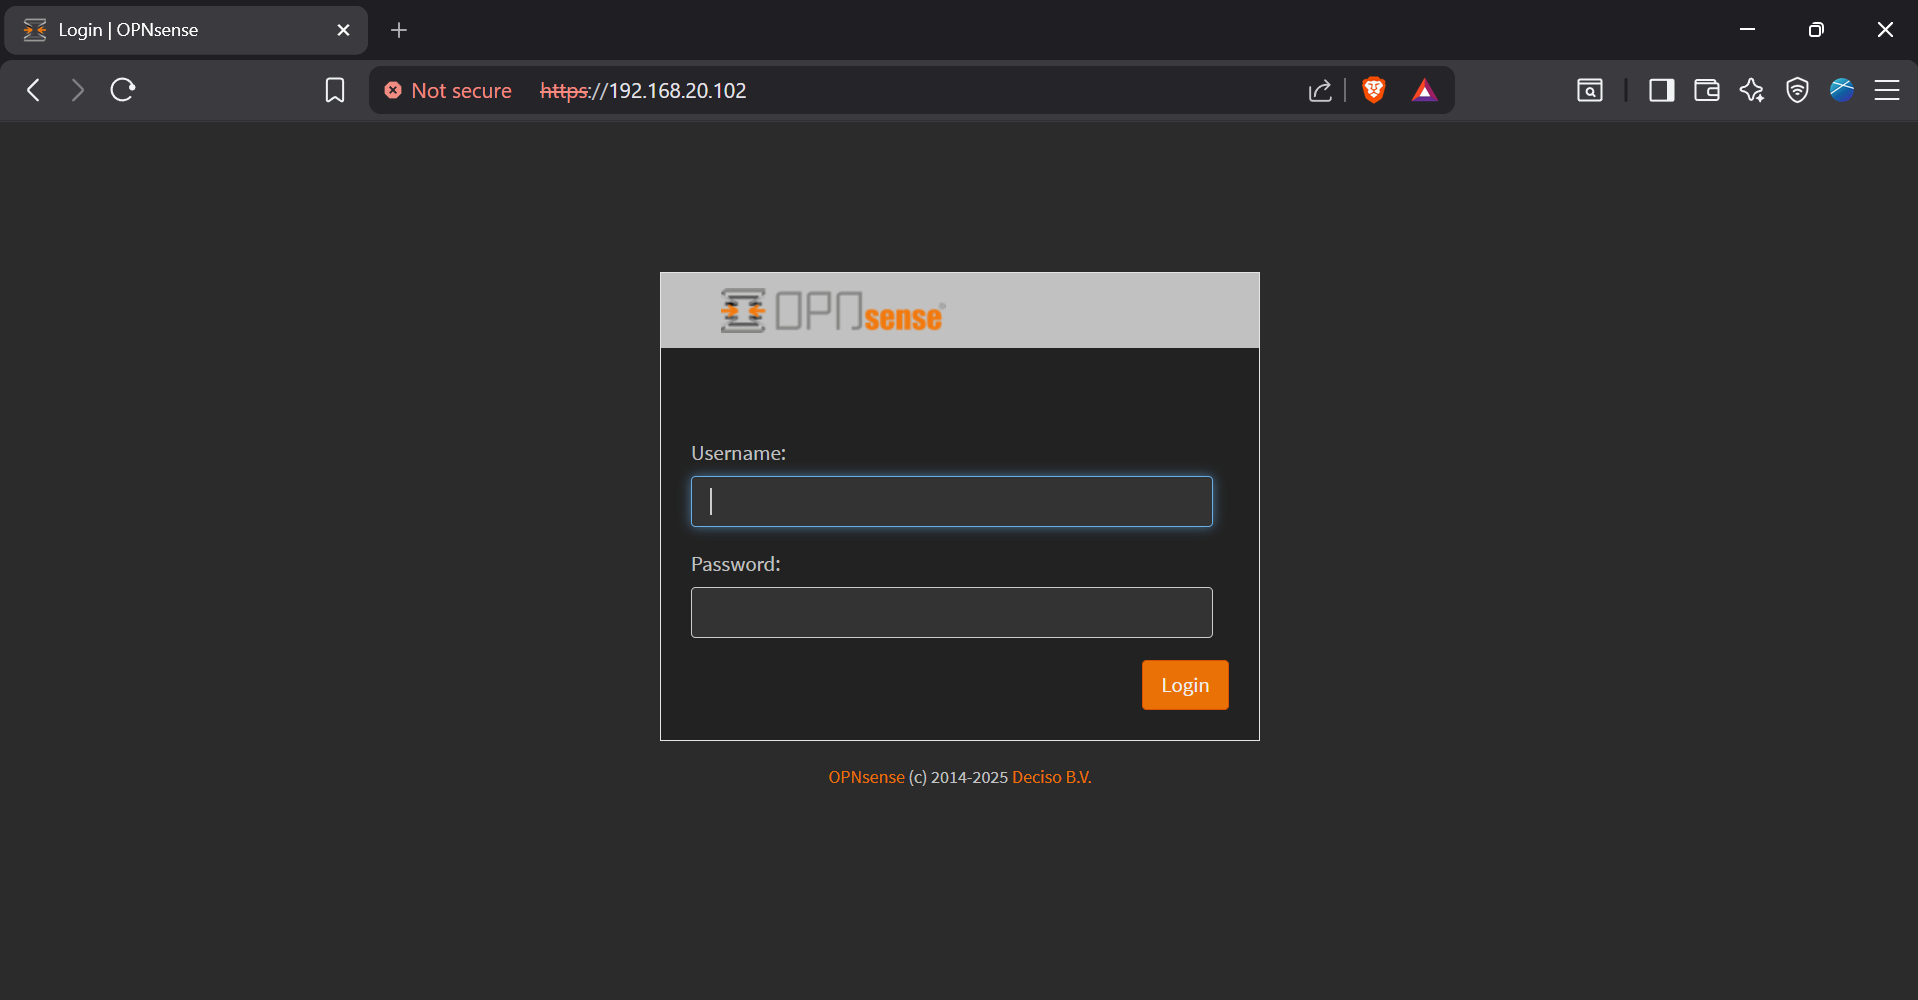
Testing WAN Access
- Open a browser on your laptop.
- Navigate to: https://192.168.20.102/
- You should now reach the OPNsense Dashboard directly, without needing to access Proxmox or the internal Debian VM.
Conclusion
The OPNsense web interface is now securely accessible from the WAN. The firewall rule and reply-to configuration ensure remote access.
Up Next
Next, we will deploy the Wazuh server in Proxmox to monitor and collect logs from devices in our lab network.