Chapter 12 - Intrusion Detection Using Suricata on OPNsense
Detecting suspicious command execution using Suricata IDS integrated with OPNsense.

Introduction
In this chapter, we focus on network-level intrusion detection by integrating Suricata with the OPNsense firewall. Suricata is a powerful intrusion detection system (IDS) that can also operate as an intrusion prevention system (IPS) when deployed inline. It provides detailed alerts along with rich metadata, making it well suited for detecting suspicious network behaviour in a homelab environment. The goal of this chapter is to configure Suricata on OPNsense and validate its ability to detect a simulated attack involving command execution on a target system.
What Is Being Implemented
Suricata is enabled on the OPNsense firewall to monitor traffic flowing into the internal LAN network. The Emerging Threats rule set is used, specifically the attack response rules, which are designed to detect the output of common system commands often used by attackers after gaining access.
For this simulation, the rule with ID 2100498 is used. This rule detects the output of the id command and triggers an alert when it indicates root-level access.
Suricata Configuration on OPNsense
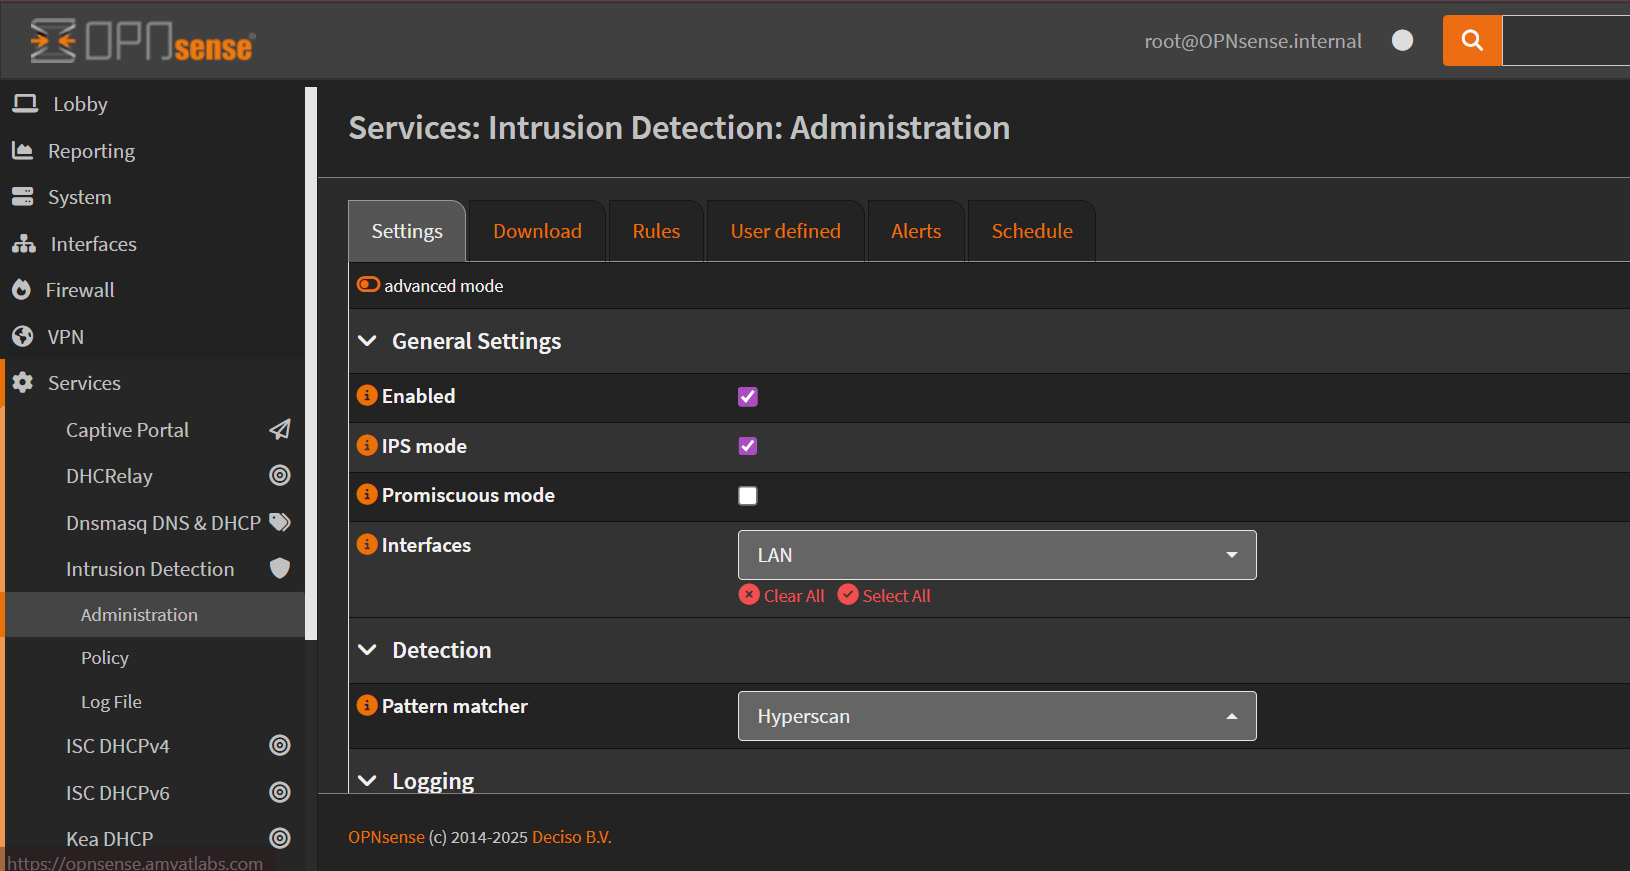
- Log in to the OPNsense web interface and navigate to:
Services → Intrusion Detection → Administration - Enable the Intrusion Detection service. Since the goal is to monitor internal systems, change the monitored interface to LAN.
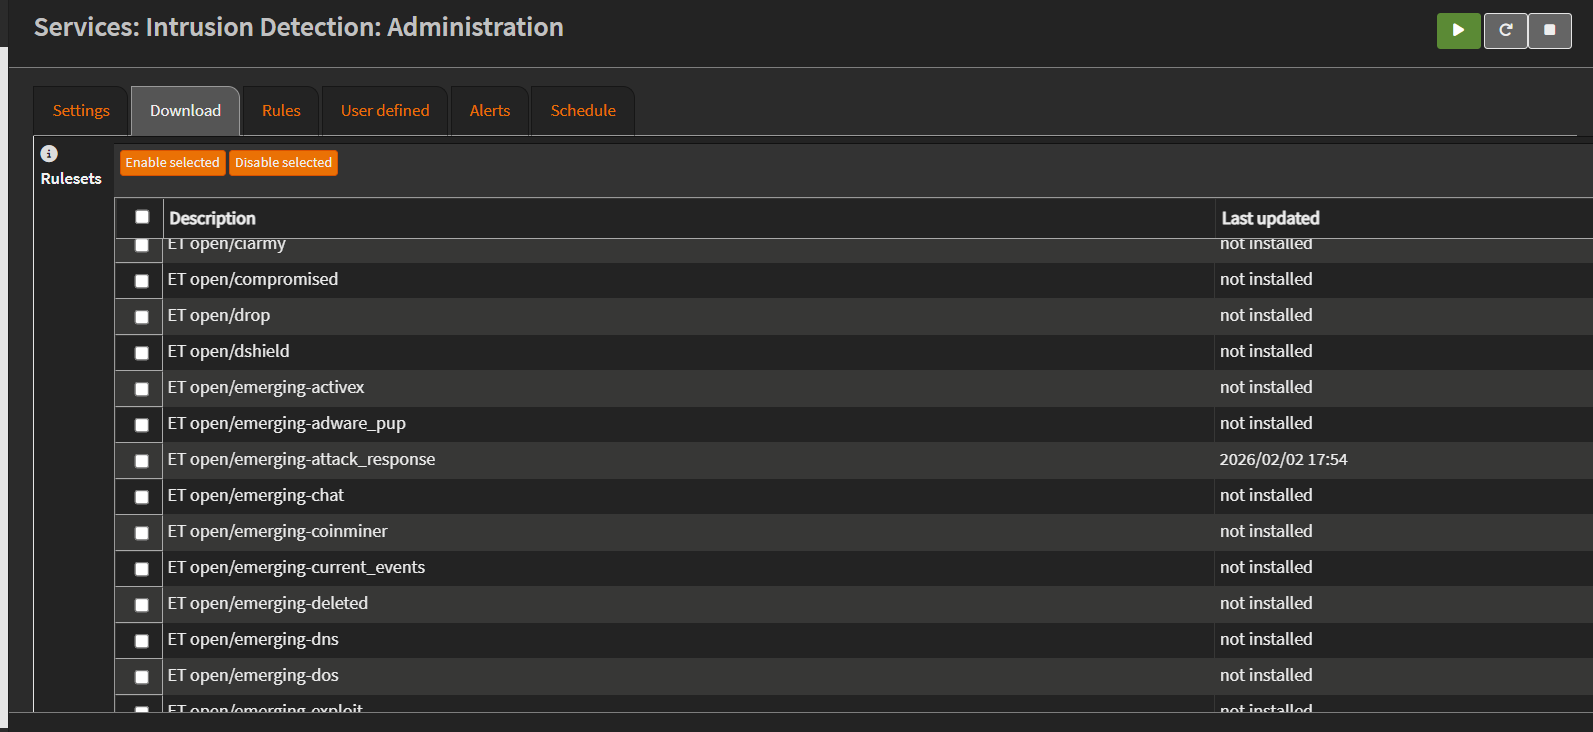
- Next, navigate to the Download tab. Enable and download the Emerging Threats rule set, focusing on the attack response rules (
emerging_attack_response). These rules contain signatures for detecting common attacker behavior’s.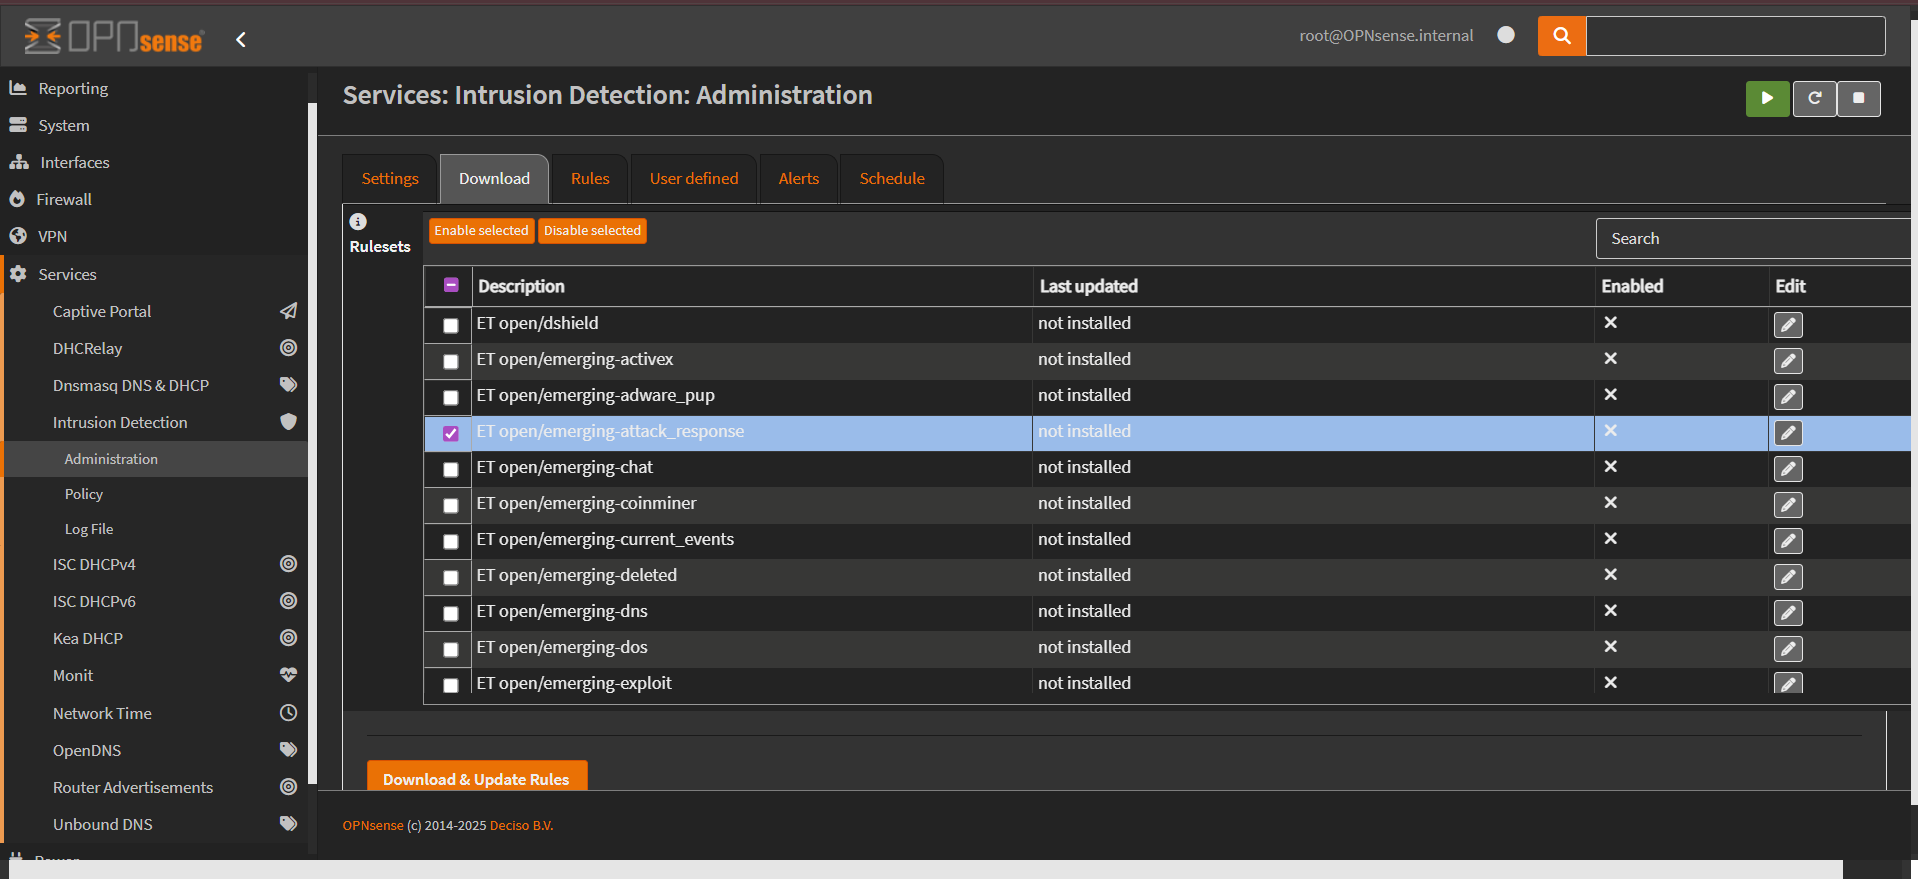
- Once downloaded, navigate to the Rules section and ensure that the rule with
SID 2100498is enabled. This rule will be used to validate the detection capability during the attack simulation.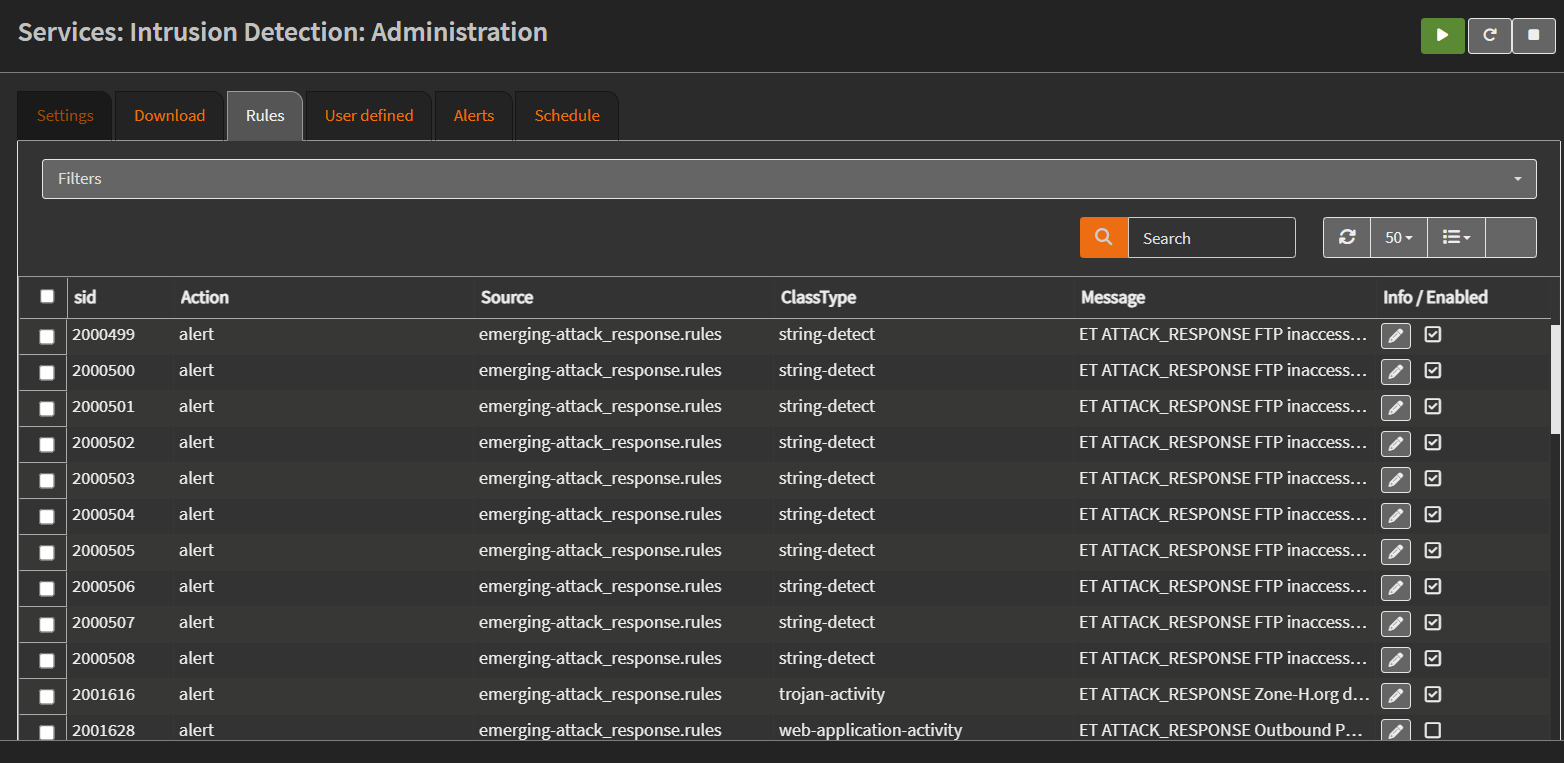
Attack Simulation
To test the intrusion detection setup, an attack is simulated against a Debian target virtual machine hosted in Proxmox. The attack is launched from a device outside the target machine’s subnet. This can be achieved either through a separate VLAN or a system connected via the WAN interface of the firewall.
This setup is important because traffic originating from the same LAN does not pass through the firewall and therefore cannot be inspected by Suricata. Only traffic that traverses the firewall will be detected.
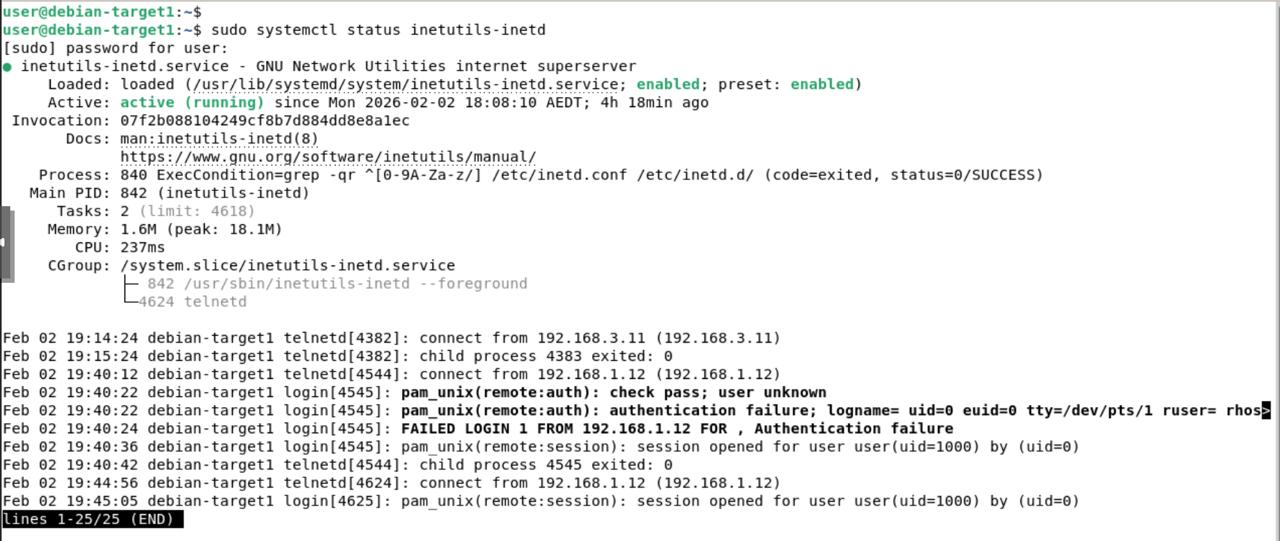
For testing purposes, root login is temporarily enabled on the Debian target VM. Since Suricata can inspect plaintext traffic, Telnet is used instead of SSH, as SSH traffic is encrypted and cannot be inspected without decryption. Ensure that the Telnet service is enabled on the target VM. The following command can be used to verify that the Telnet service is running:
1
sudo systemctl status inetutils-inetd
Connectivity can be verified using the Telnet client from the attacking machine:
1
telnet 192.168.3.10
After logging in with valid credentials, switch to the root user and execute the id command. The output confirms root access by returning the user and group IDs associated with the root account. 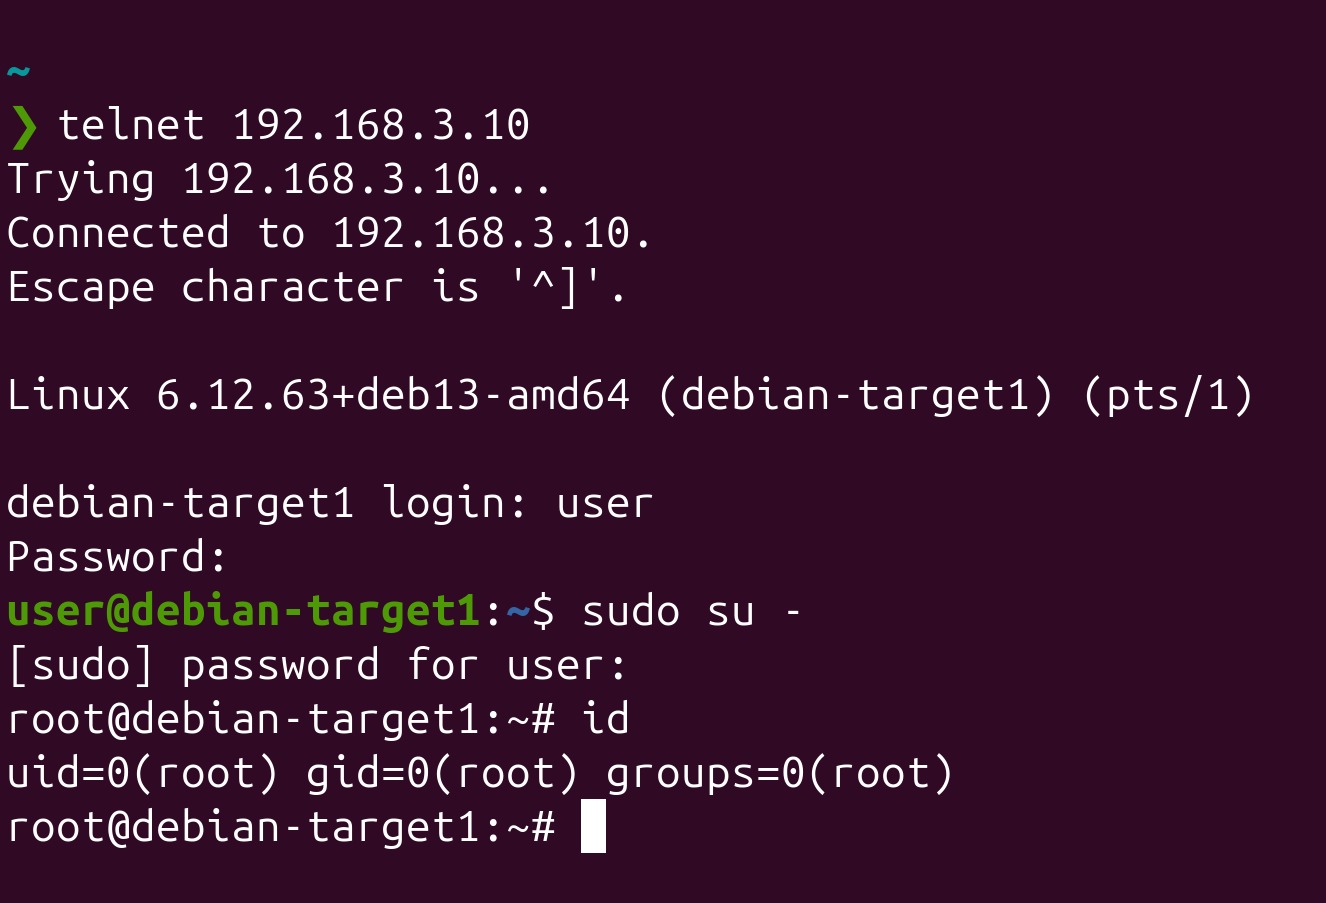
Detection and Alert Validation
After executing the command, navigate back to the OPNsense interface and open: Services → Intrusion Detection → Alerts 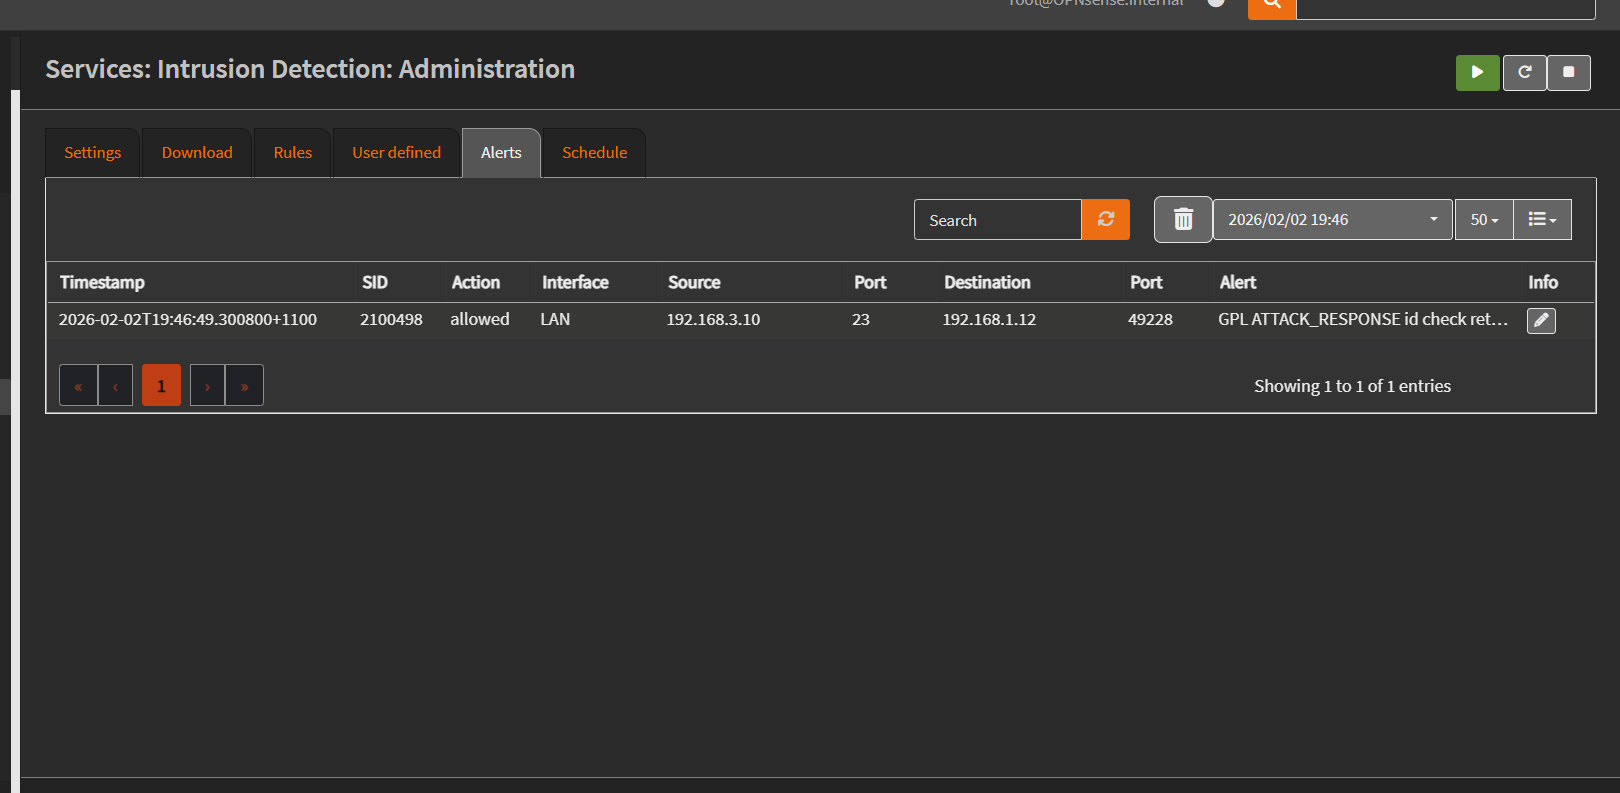 An alert is generated by Suricata indicating detection of the attack response behaviour. The alert shows the rule
 ID 2100498 with the message indicating a root ID check. 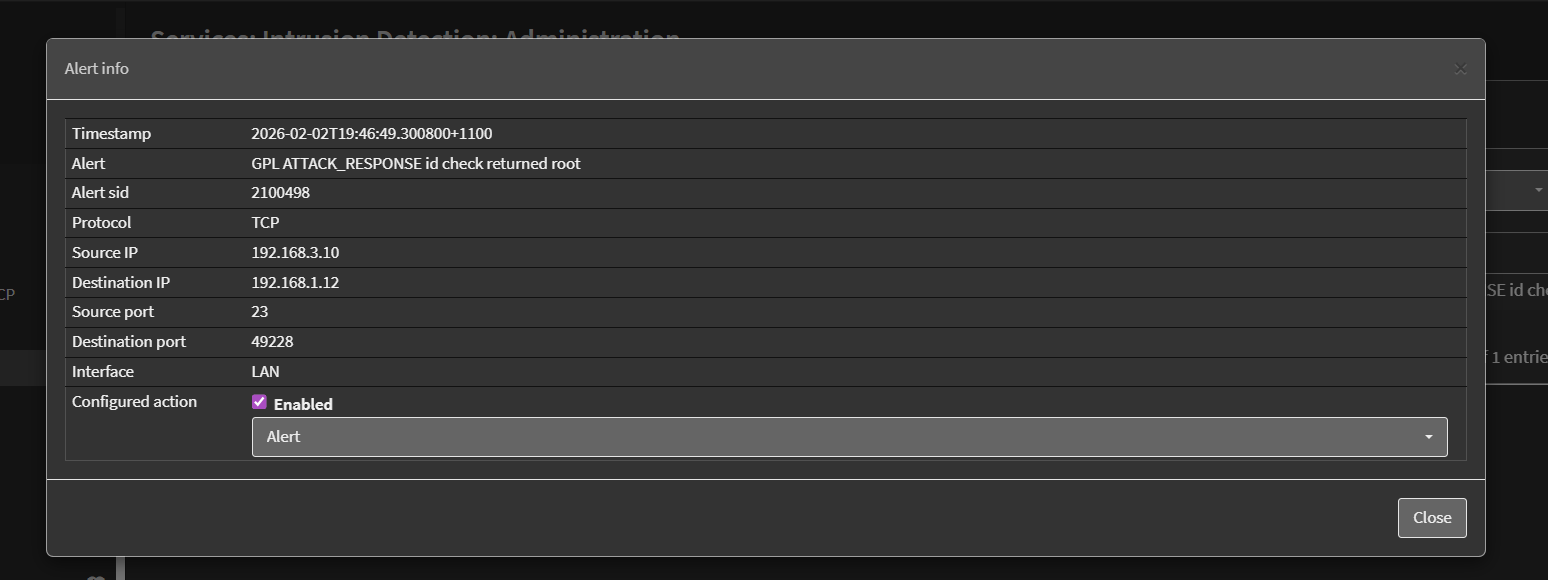 The alert includes useful contextual information such as the source and destination IP addresses, ports, protocol, timestamp, and signature details. This confirms that Suricata successfully inspected the network traffic and detected the suspicious command output in real time.
Conclusion
This chapter showed how Suricata on OPNsense can detect suspicious activity by inspecting network traffic. Using attack response rules, the firewall identified a command often used after gaining access, demonstrating how network monitoring adds an extra layer of security in a homelab.